Certificates are digital files that help ensure secure communication between a user’s computer and a website, server, or network service. They verify that a connection is legitimate and encrypted, preventing unauthorized access and data interception.
In your case, since you’re developing a proxy for web filtering, installing certificates is an essential first step. This allows your proxy to inspect encrypted traffic without triggering security warnings in browsers or applications. The installation process varies depending on your specific needs, but the steps below will guide you through setting up certificates on both Windows and macOS.
Setting Up Certificates on Windows
Setting up a certificate on Windows ensures your system recognizes and trusts the certificate authority (CA), preventing security warnings when accessing filtered web content through your proxy. Follow the steps below to install a trusted root certificate.
Installing a Trusted Root Certificate
Before proceeding, decide whether you want to install the certificate for just your user account or for the entire machine. If you’re testing or using the proxy only for yourself, installing it under Current User is sufficient. However, if you need system-wide filtering, install it under Local Machine.
Step 1: Current User
This method installs the certificate only for the logged-in user. If you’re testing or developing, this is the quickest way to get started.
Double-click the certificate file.

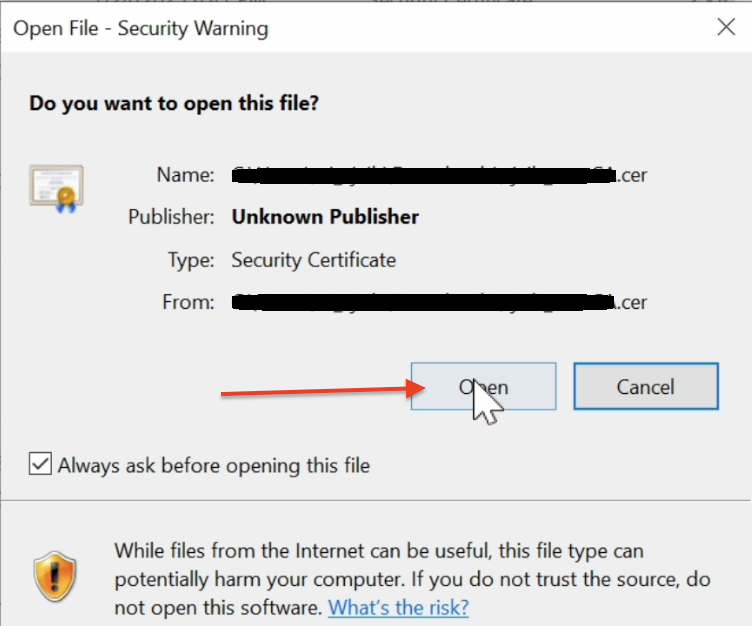
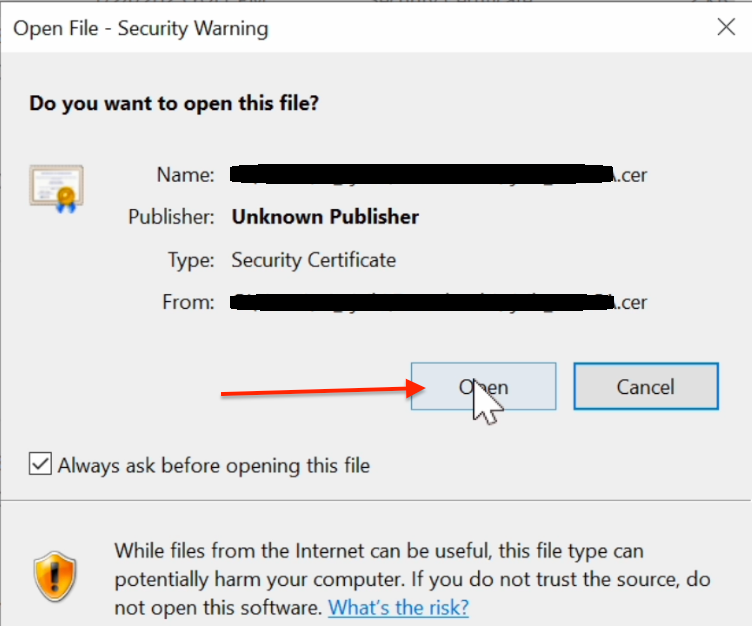
If the Open File - Security Warning dialog appears, click Open.
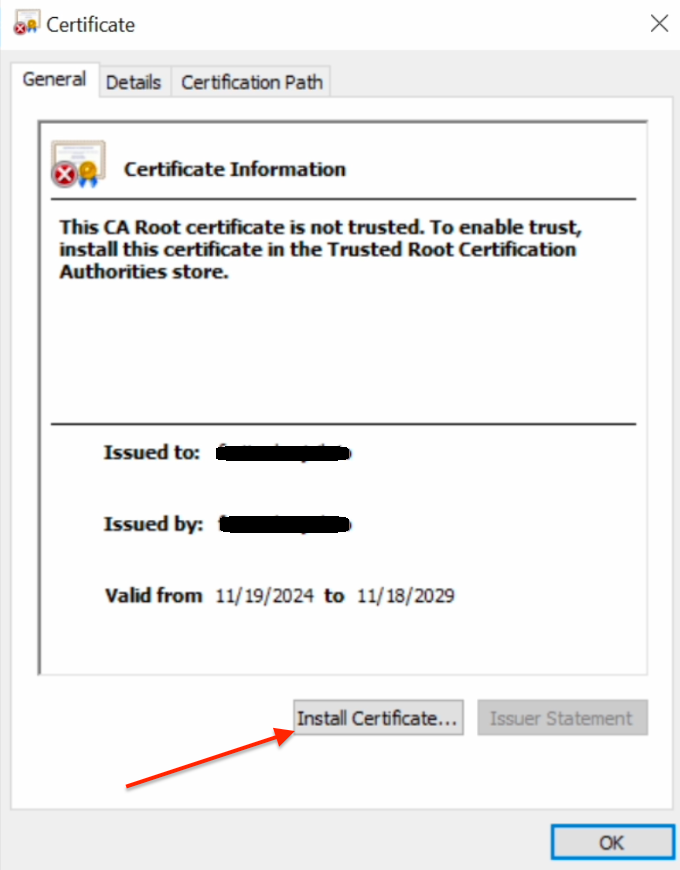
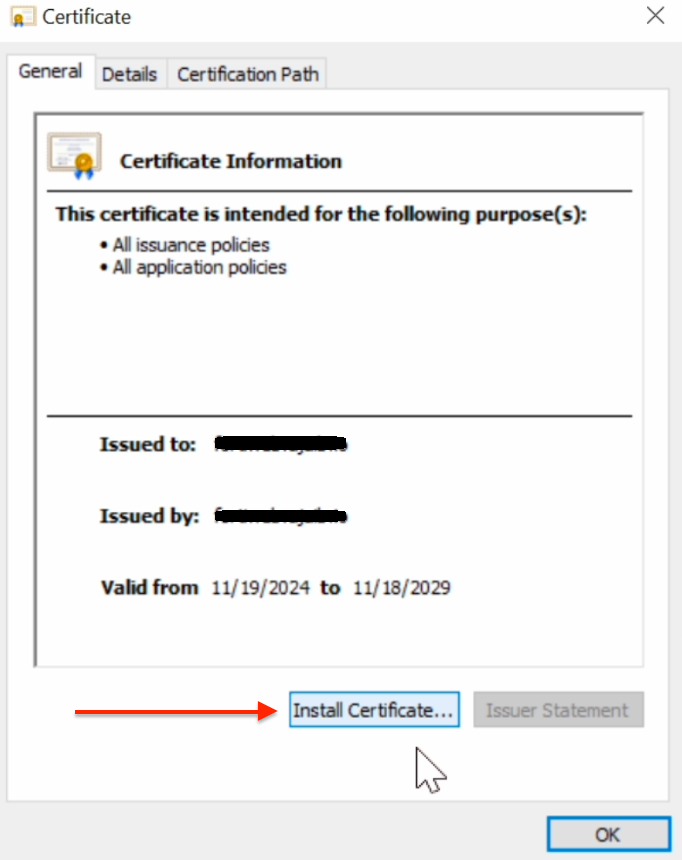
When the Certificate Wizard opens, click Install Certificate….
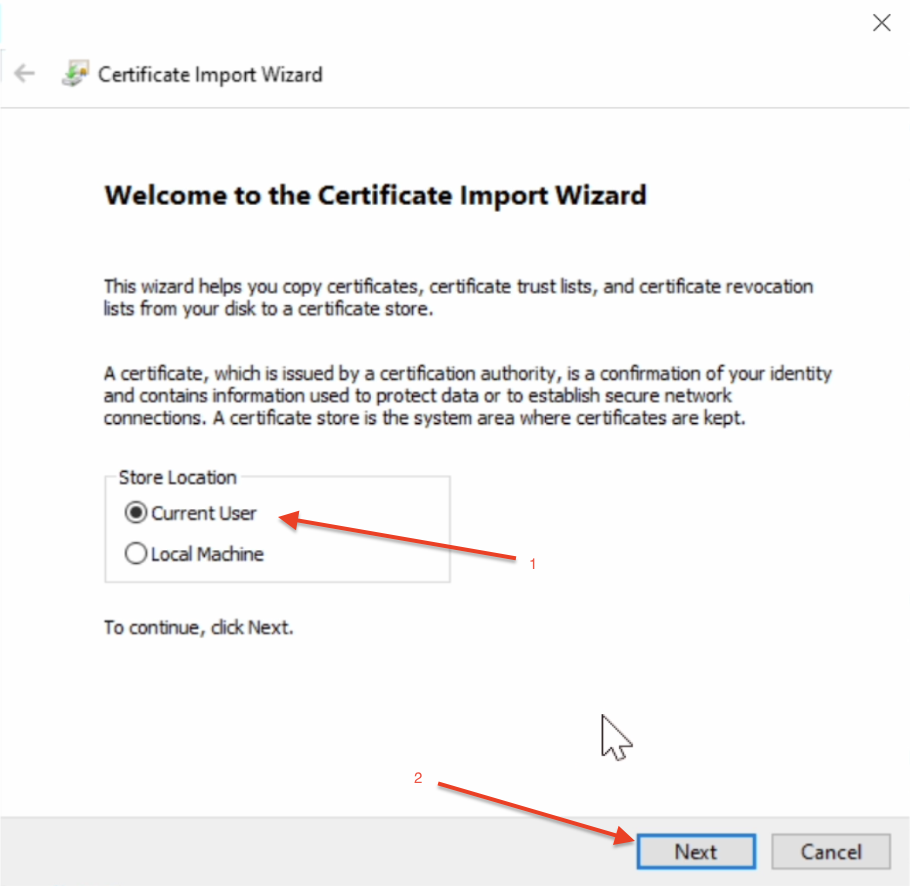
In the Certificate Import Wizard, ensure that Store Location is set to Current User.
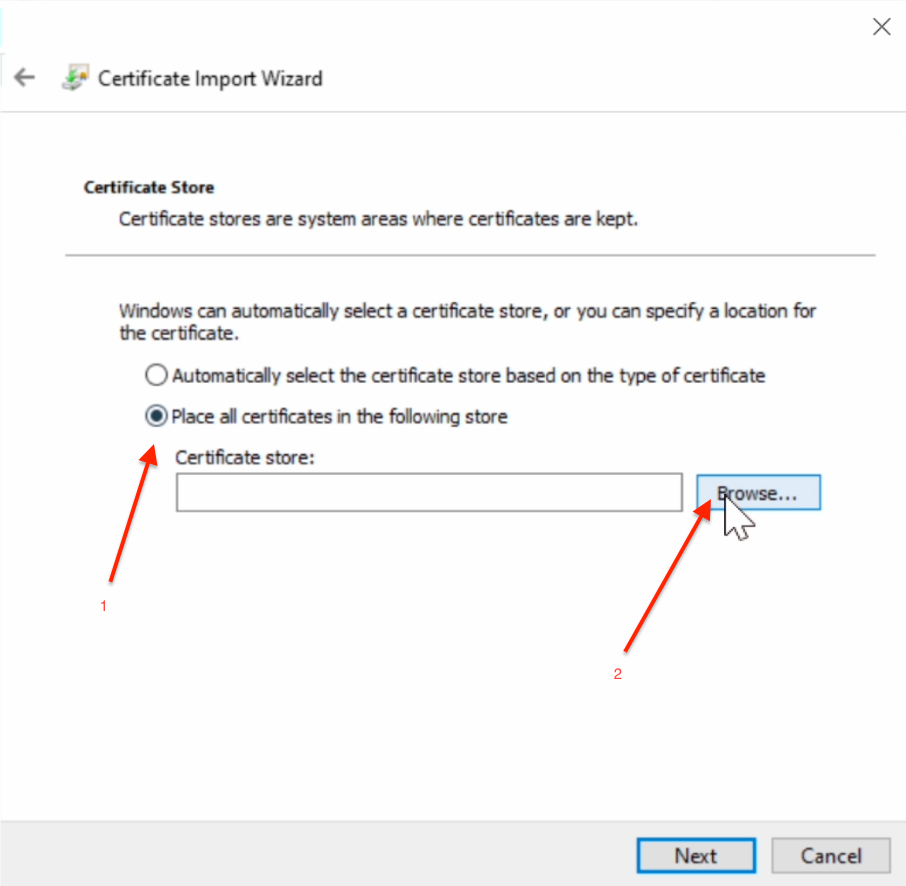
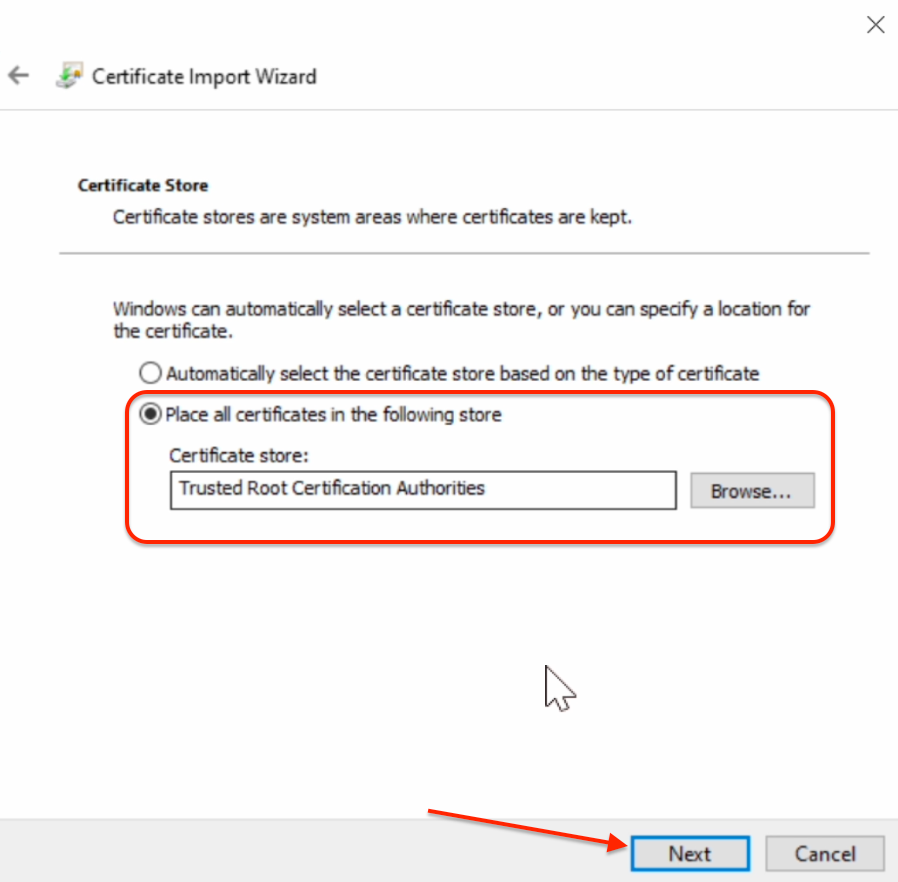
On the Certificate Store page, select Place all certificates in the following store, then click Browse….
Choose Trusted Root Certification Authorities and click OK.

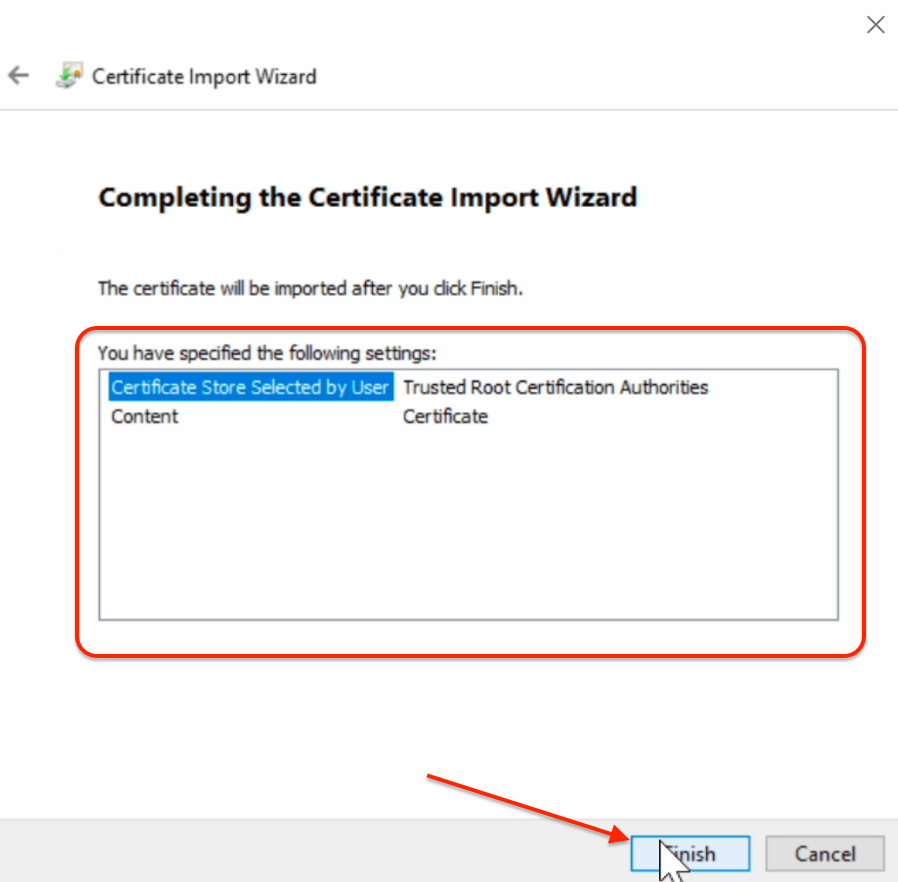
Confirm the selected Certificate Store is correct, then click Next.
On the Completing the Certificate Import Wizard page, click Finish.

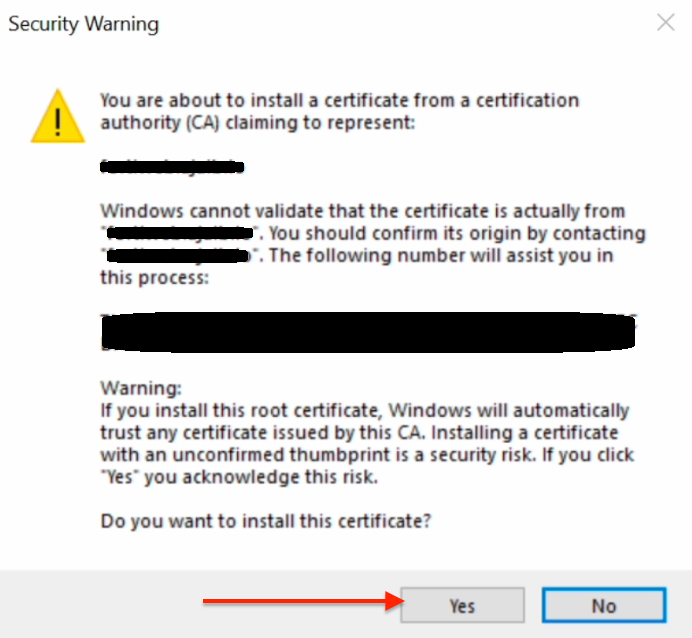
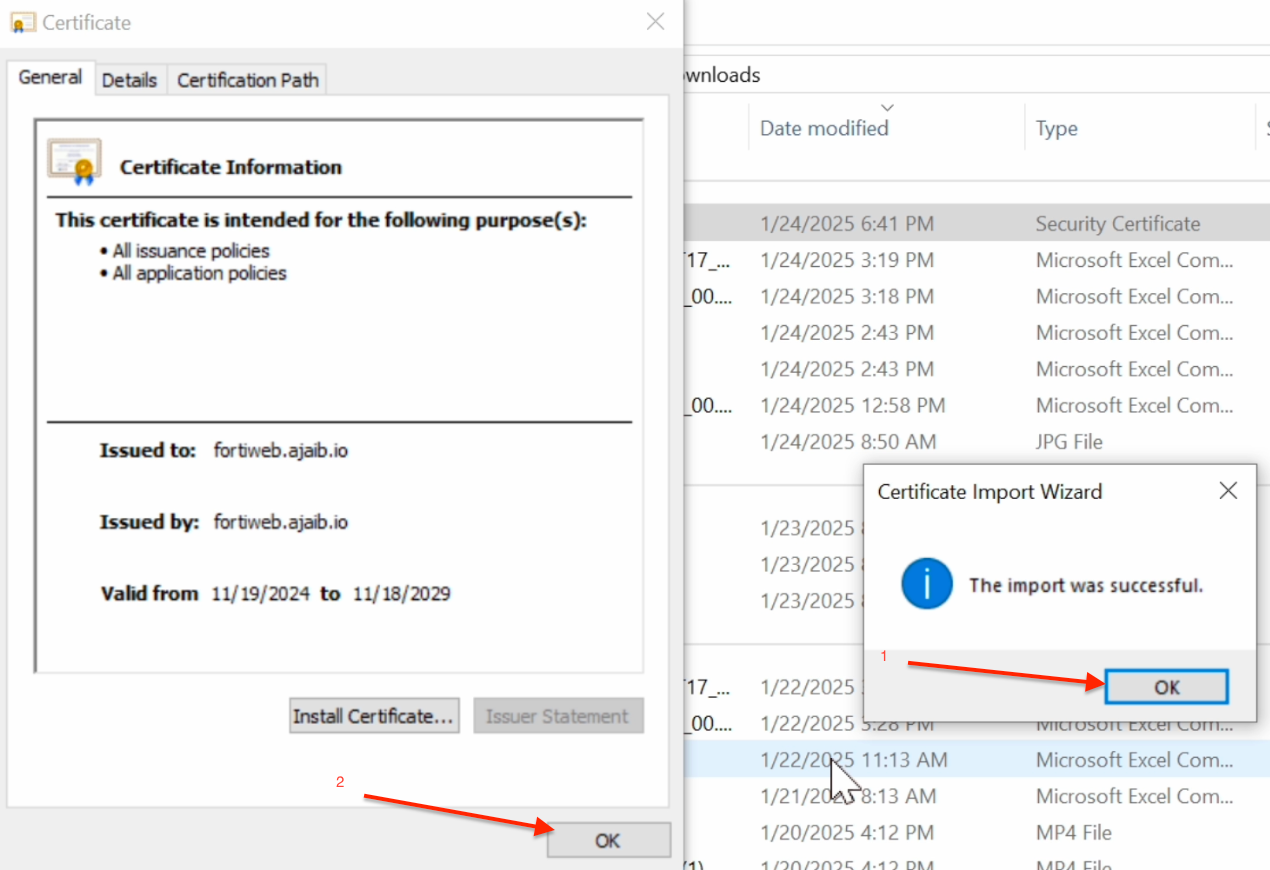
If a Security Warning popup appears, click Yes.
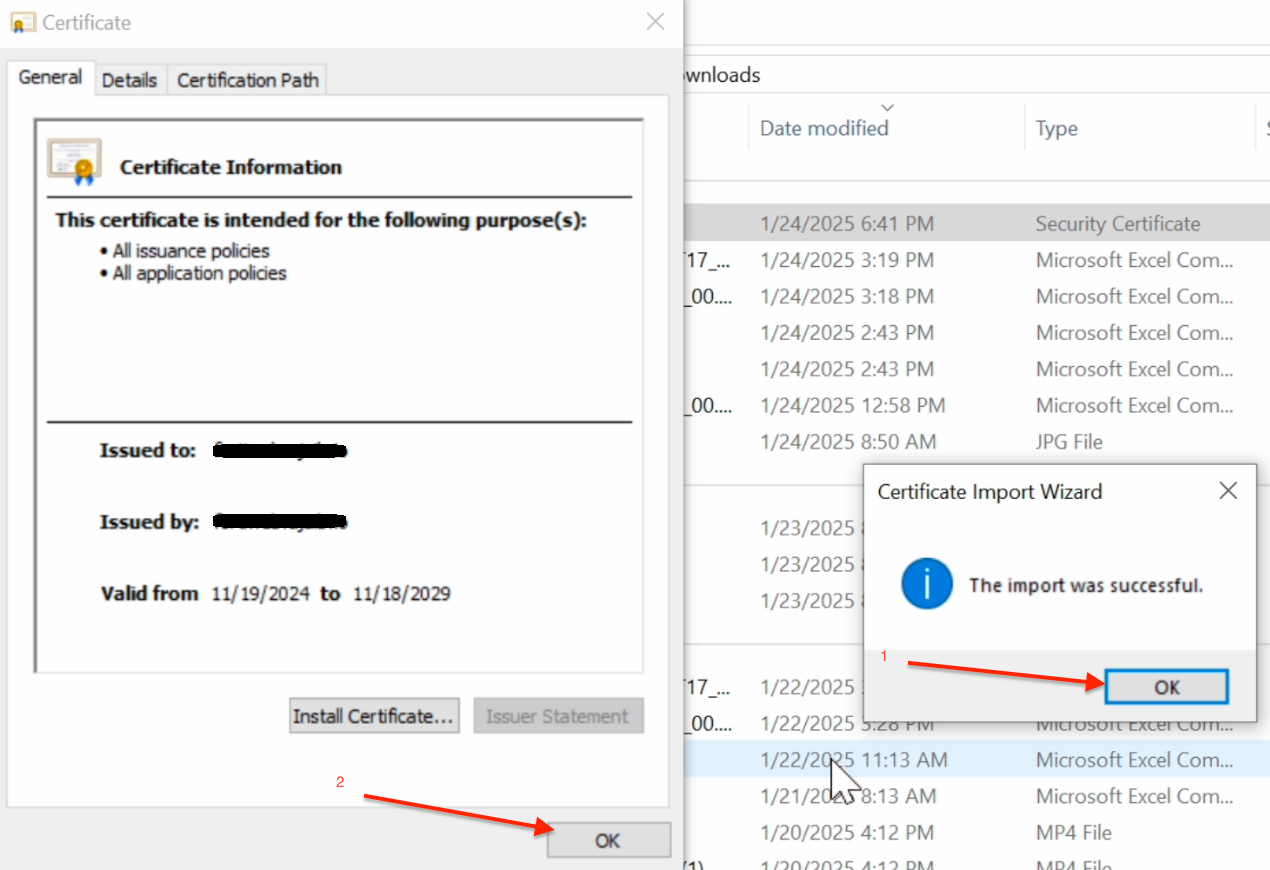
The certificate import is now complete. Click OK to close any remaining popups.
Step 2: Local Machine
If you need the certificate to be trusted system-wide for all users, follow these steps. Admin access is required.
Double-click the certificate file.

If the Open File - Security Warning dialog appears, click Open.
When the Certificate Wizard opens, click Install Certificate….
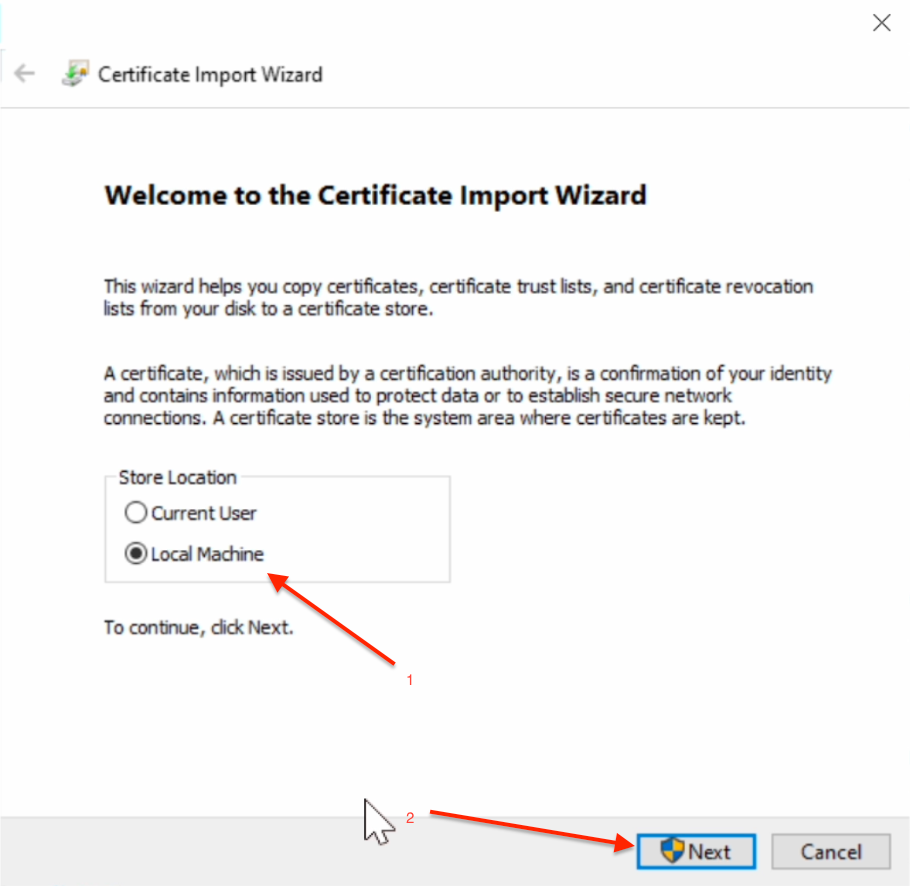
In the Certificate Import Wizard, ensure that Store Location is set to Local Machine.
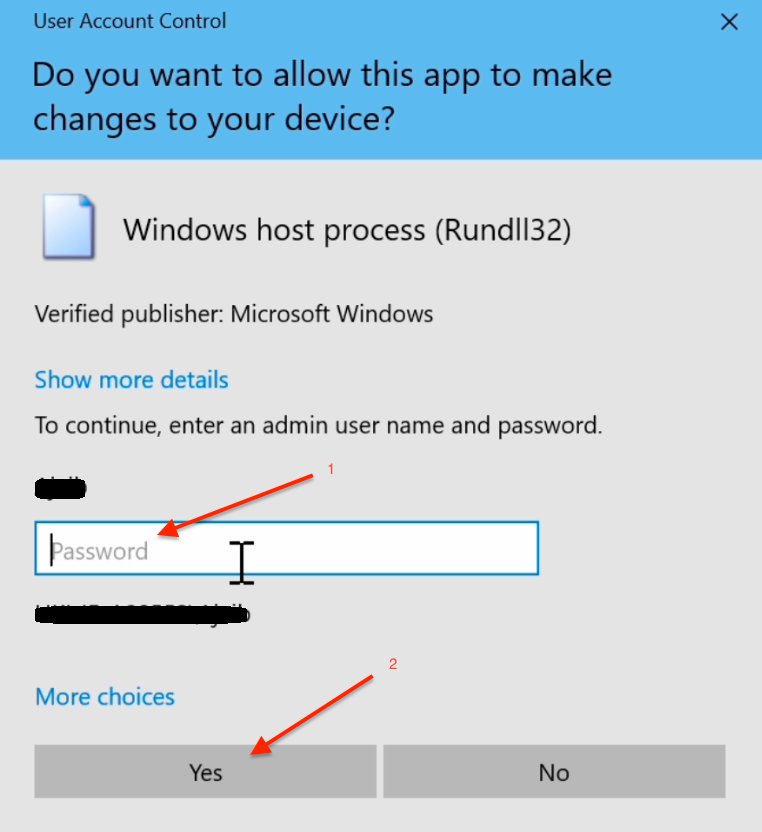
If prompted for a password, enter the Administrator password.
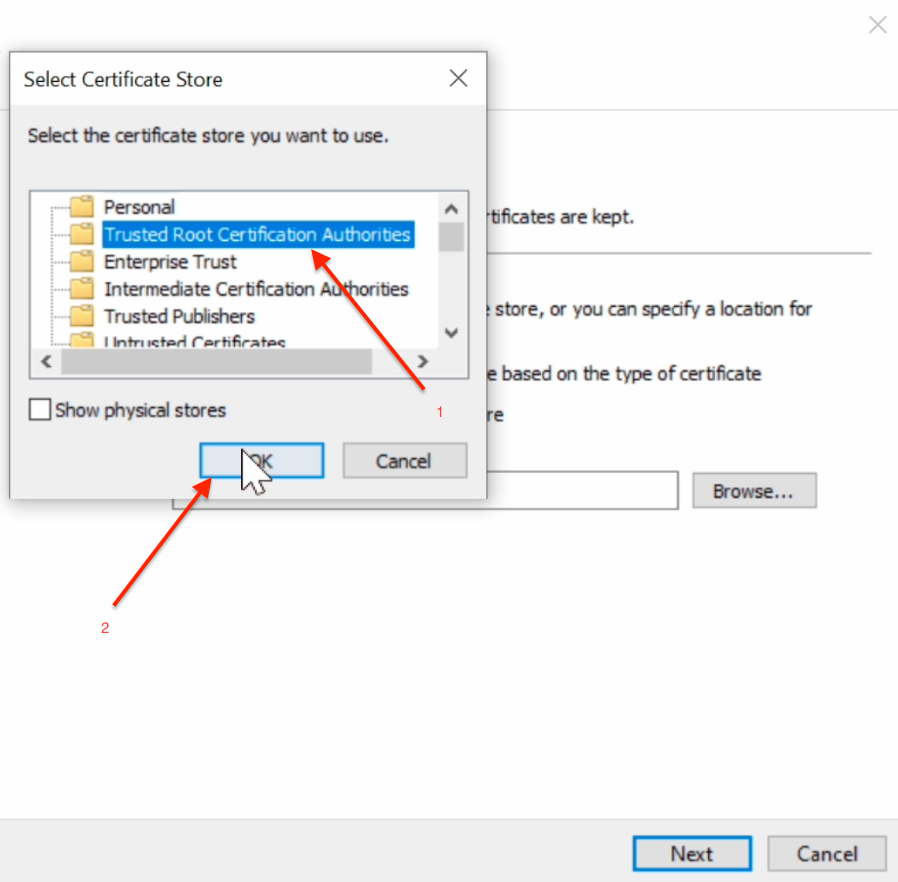
On the Certificate Store page, select Place all certificates in the following store, then click Browse….

Choose Trusted Root Certification Authorities and click OK.
Confirm the selected Certificate Store is correct, then click Next.

On the Completing the Certificate Import Wizard page, click Finish.
The certificate import is now complete. Click OK to close any remaining popups.
Verifying Installed Certificates Using Snap-ins
After installation, it’s always a good idea to verify that the certificate is correctly installed. This ensures that your proxy can operate smoothly without running into trust issues.
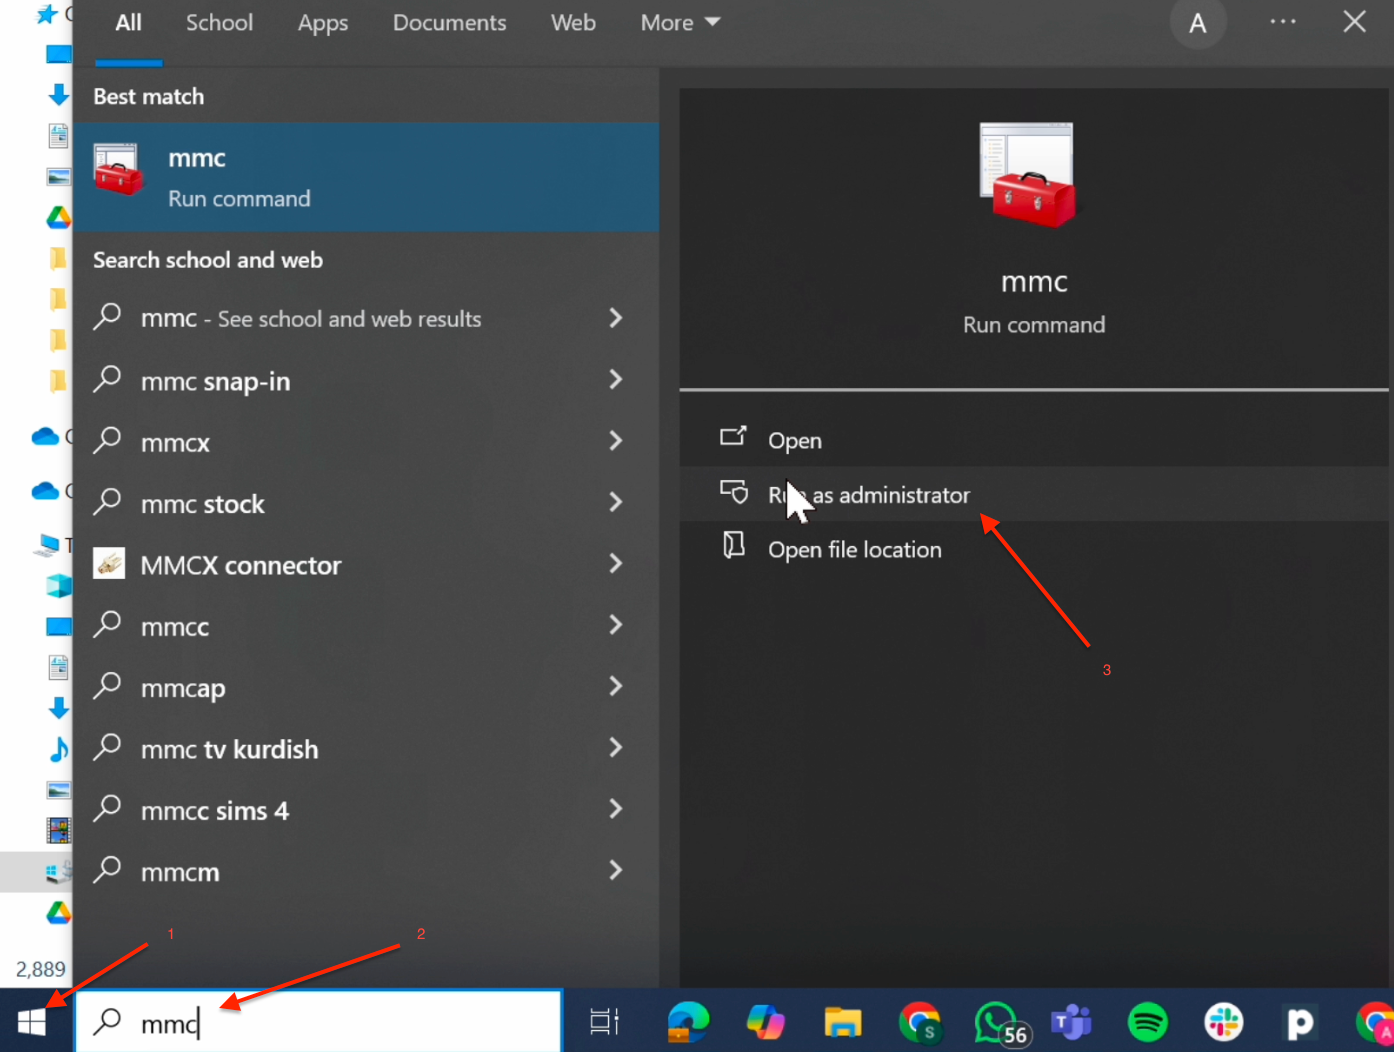
Open the Start Menu, type mmc, and select Run as Administrator.
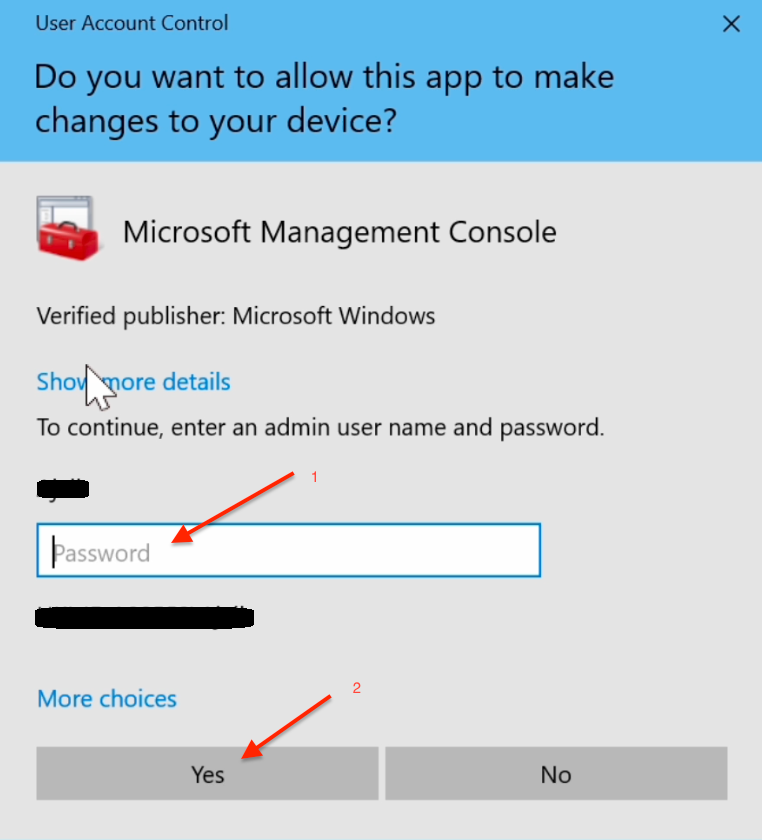
If prompted for a password, enter the Administrator password.
When the Console1 dialog opens, click File, then select Add/Remove Snap-in.
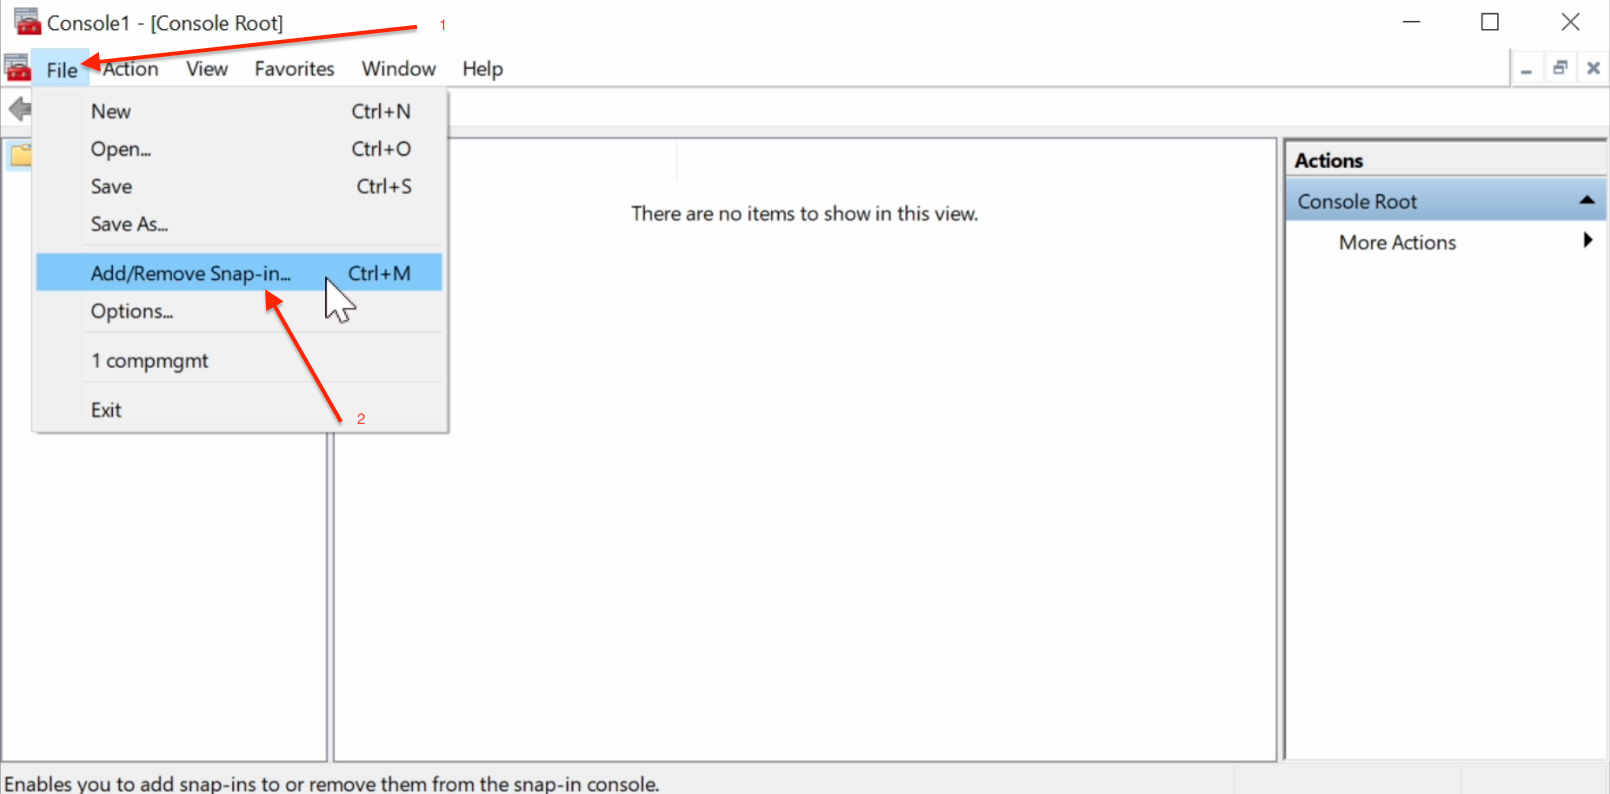
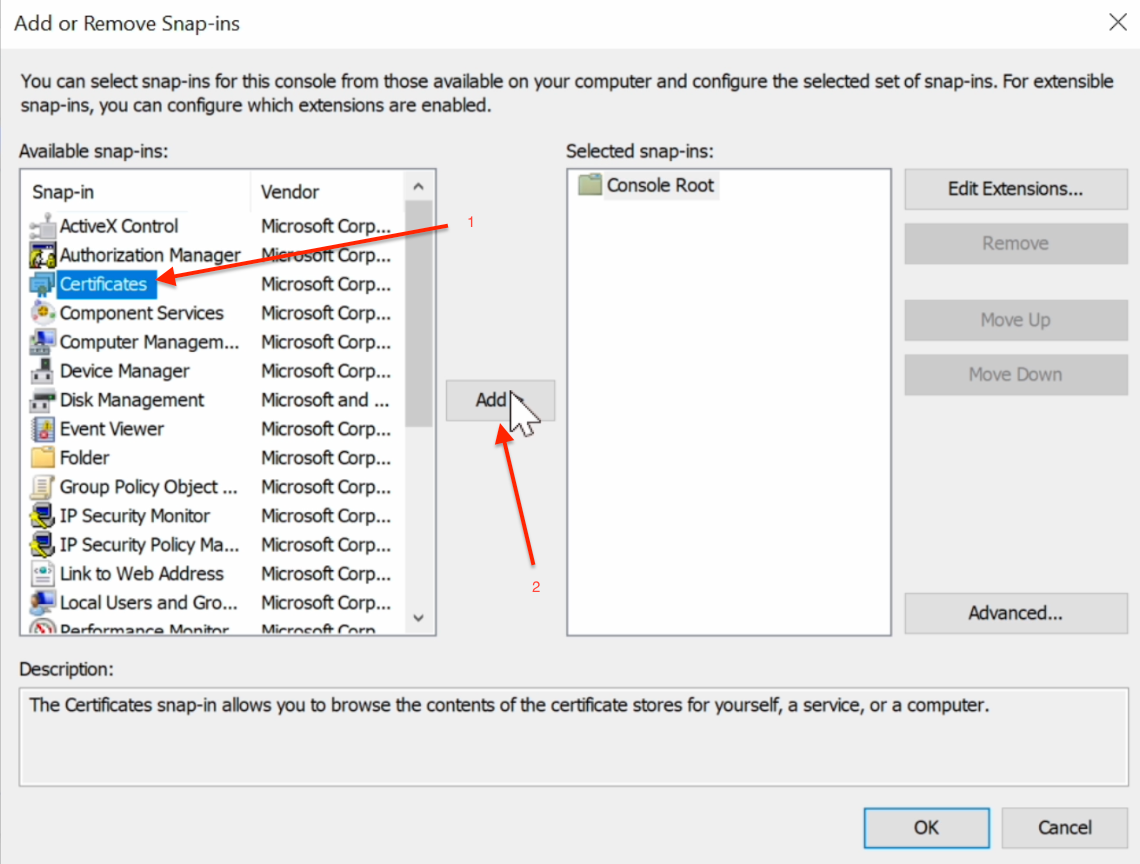
In the Add or Remove Snap-ins dialog, select Certificates from the Available Snap-ins list and click Add.
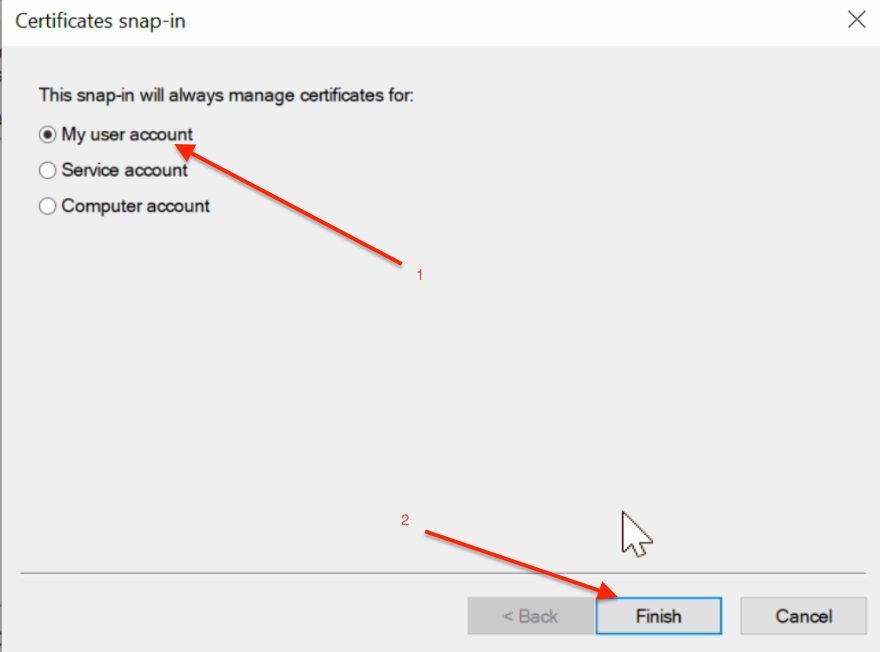
In the Certificates Snap-in dialog, choose My user account and click Finish.
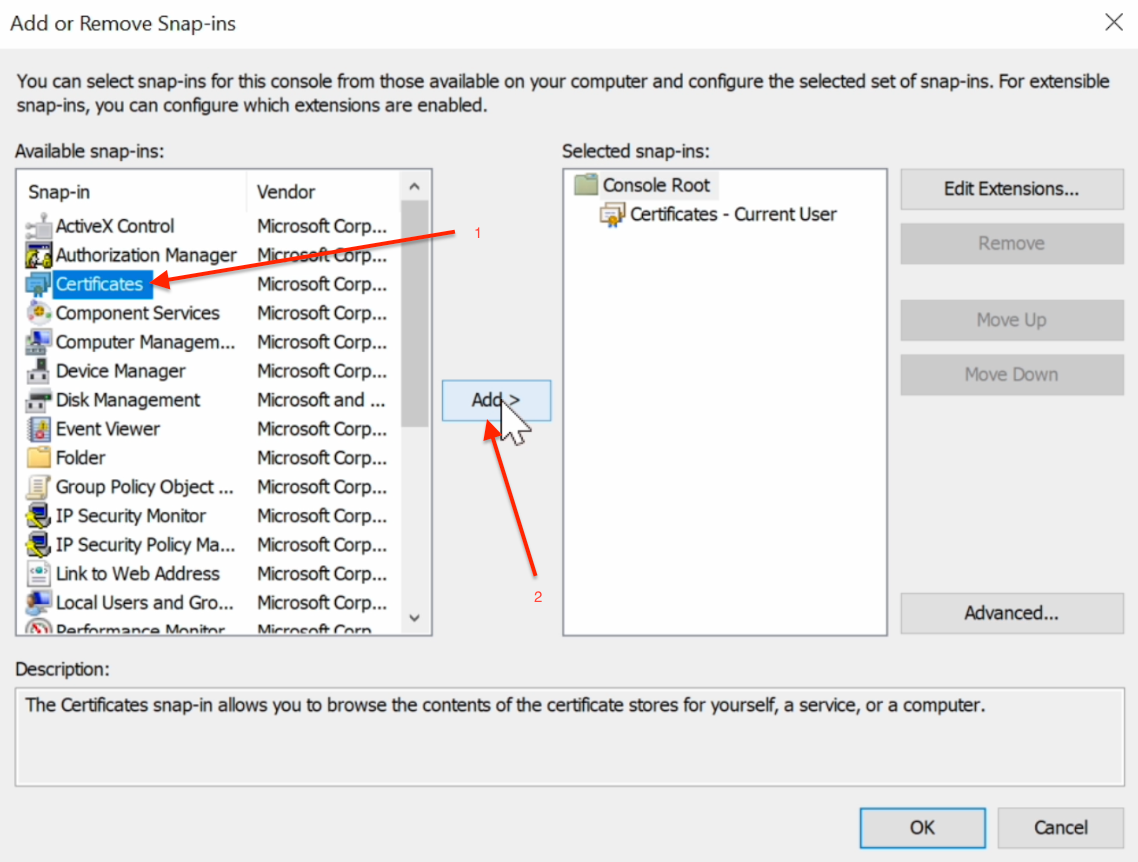
Repeat the process by selecting Certificates again from the Available Snap-ins list and clicking Add.
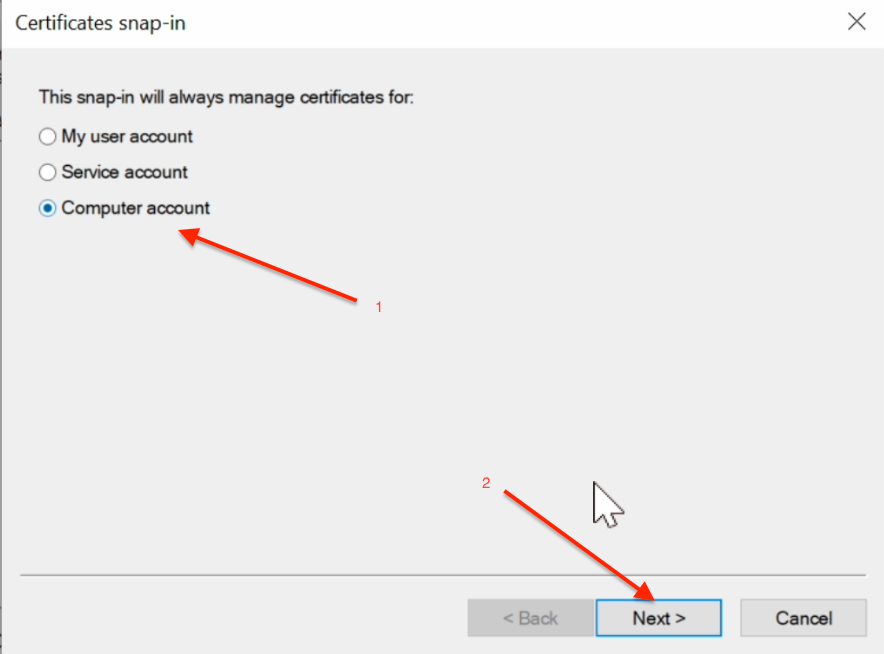
In the Certificates Snap-in dialog, select Computer account and click Next.
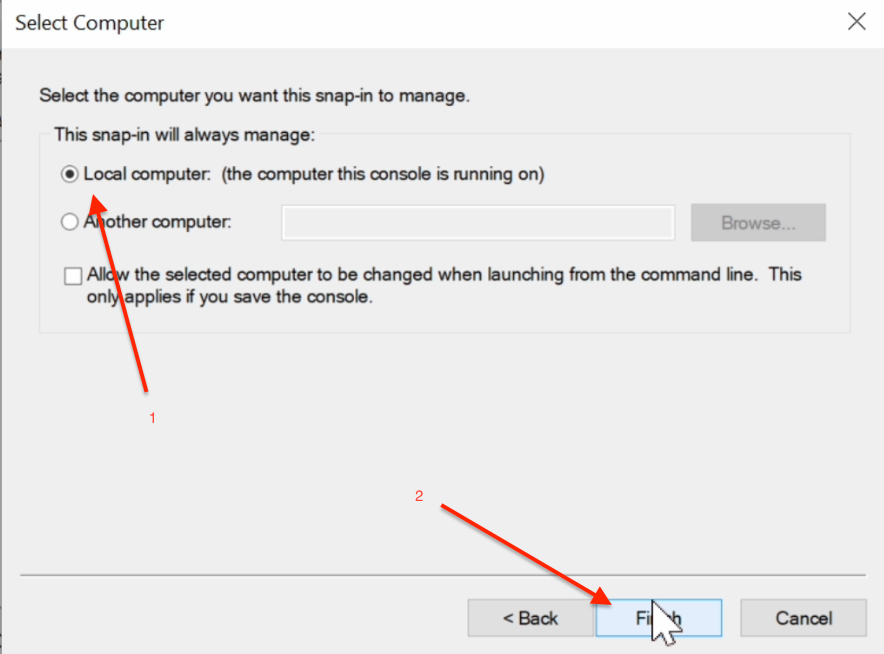
In the Select Computer dialog, choose Local computer and click Finish.
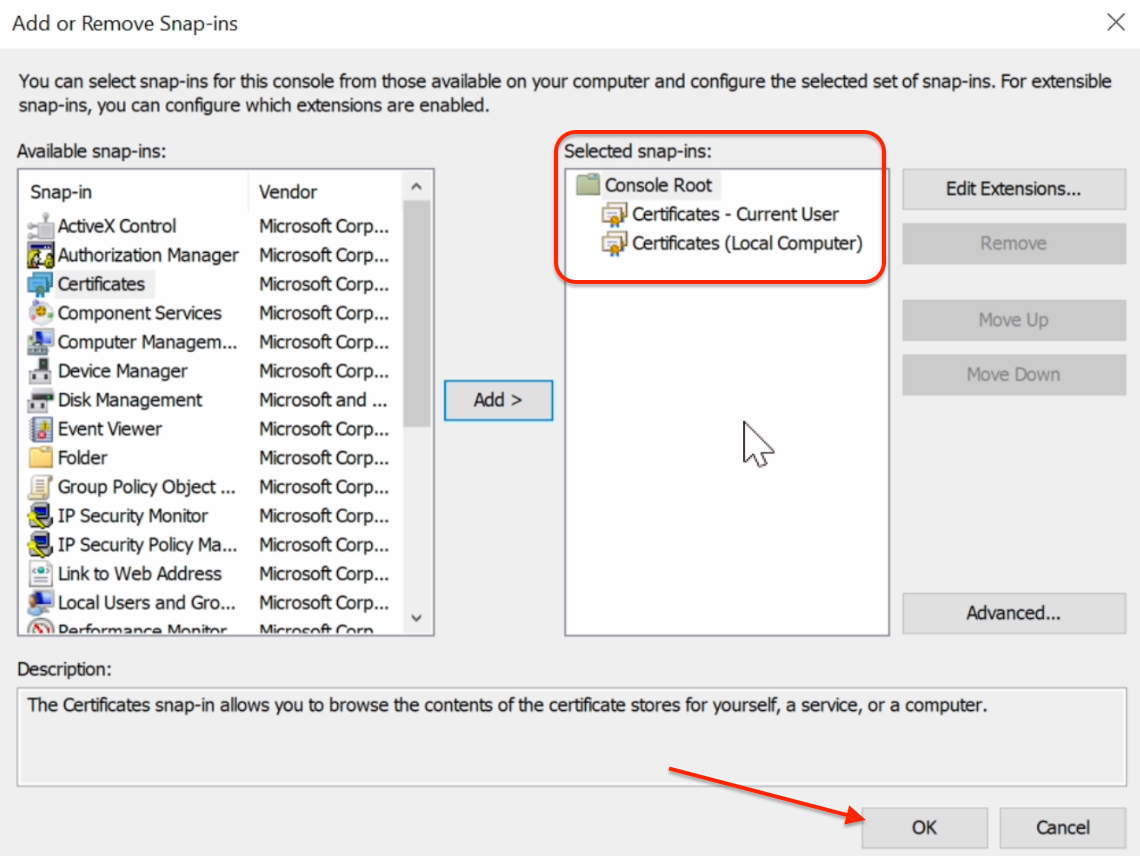
Ensure the Selected Snap-ins list includes both Certificates - Current User and Certificates - (Local Computer). Click OK.
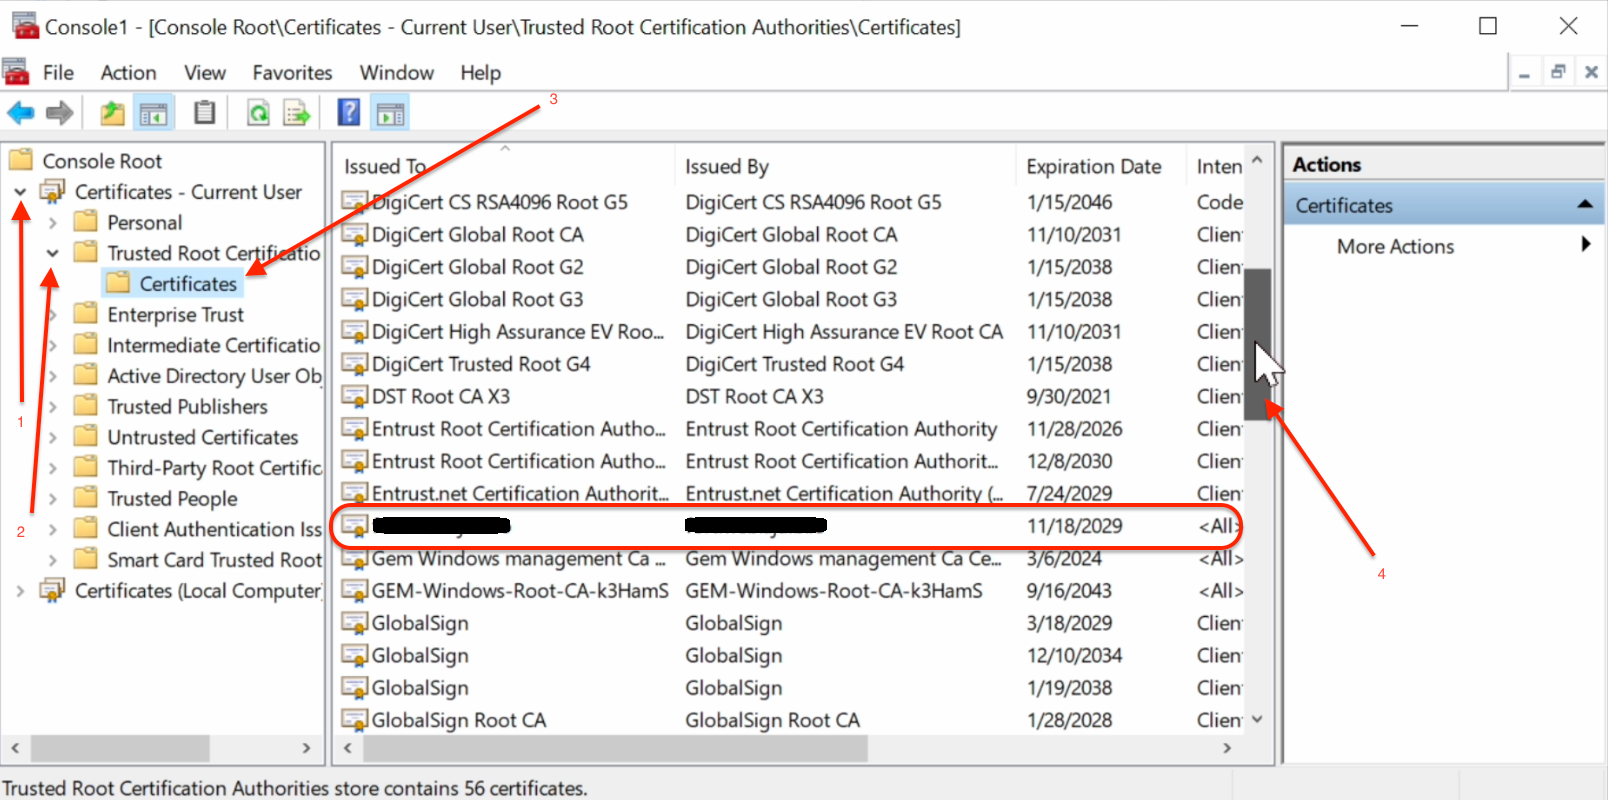
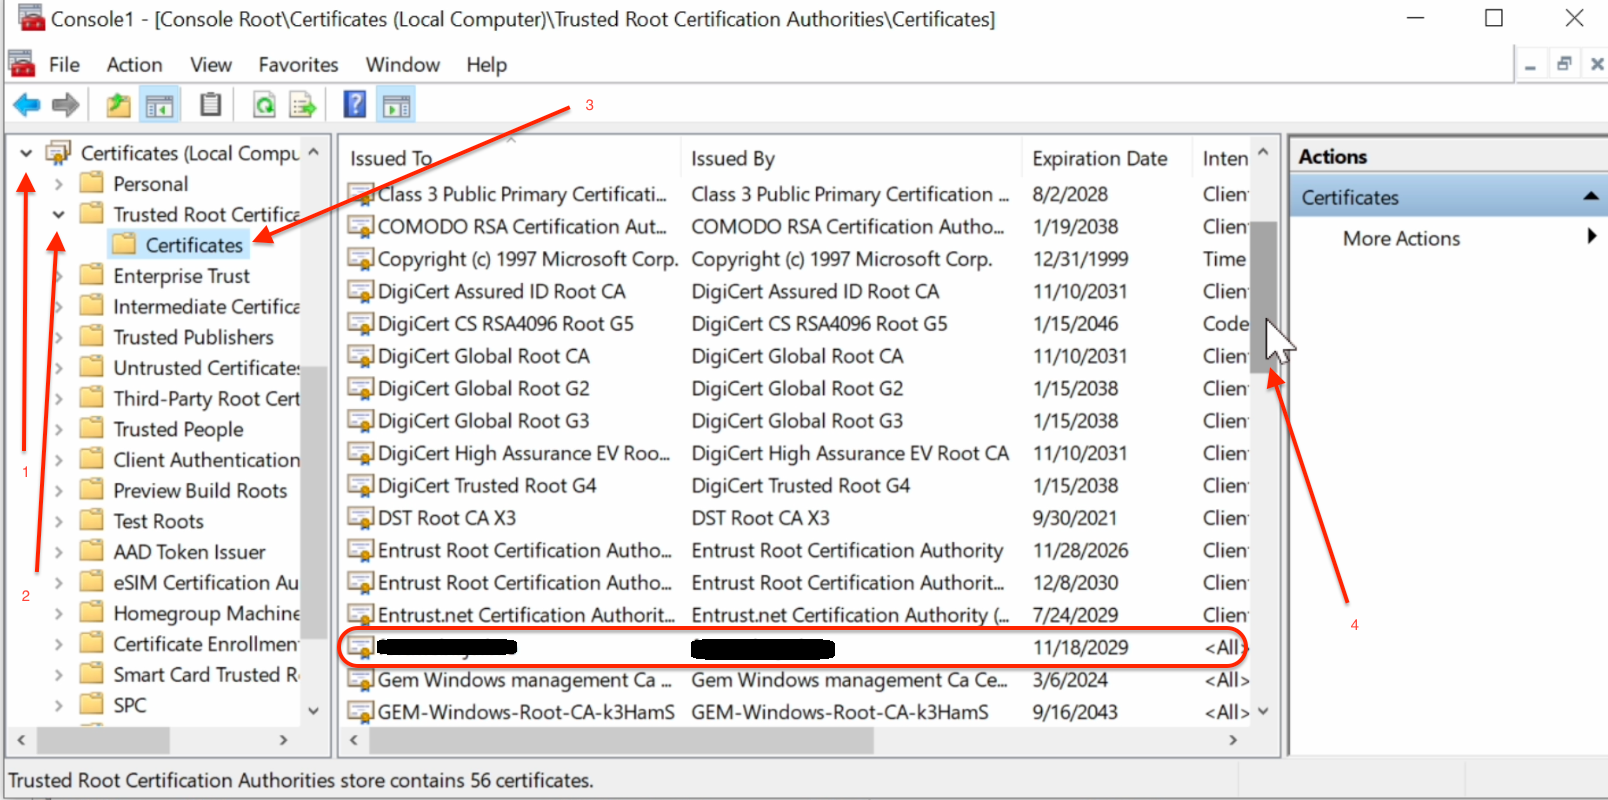
Verify that the certificate is installed by expanding:
- Certificates - Current User → Trusted Root Certification Authorities → Certificates, then scroll through the list to ensure the certificate is present.
- Certificates - (Local Computer) → Trusted Root Certification Authorities → Certificates, and ensure the same certificate is listed.
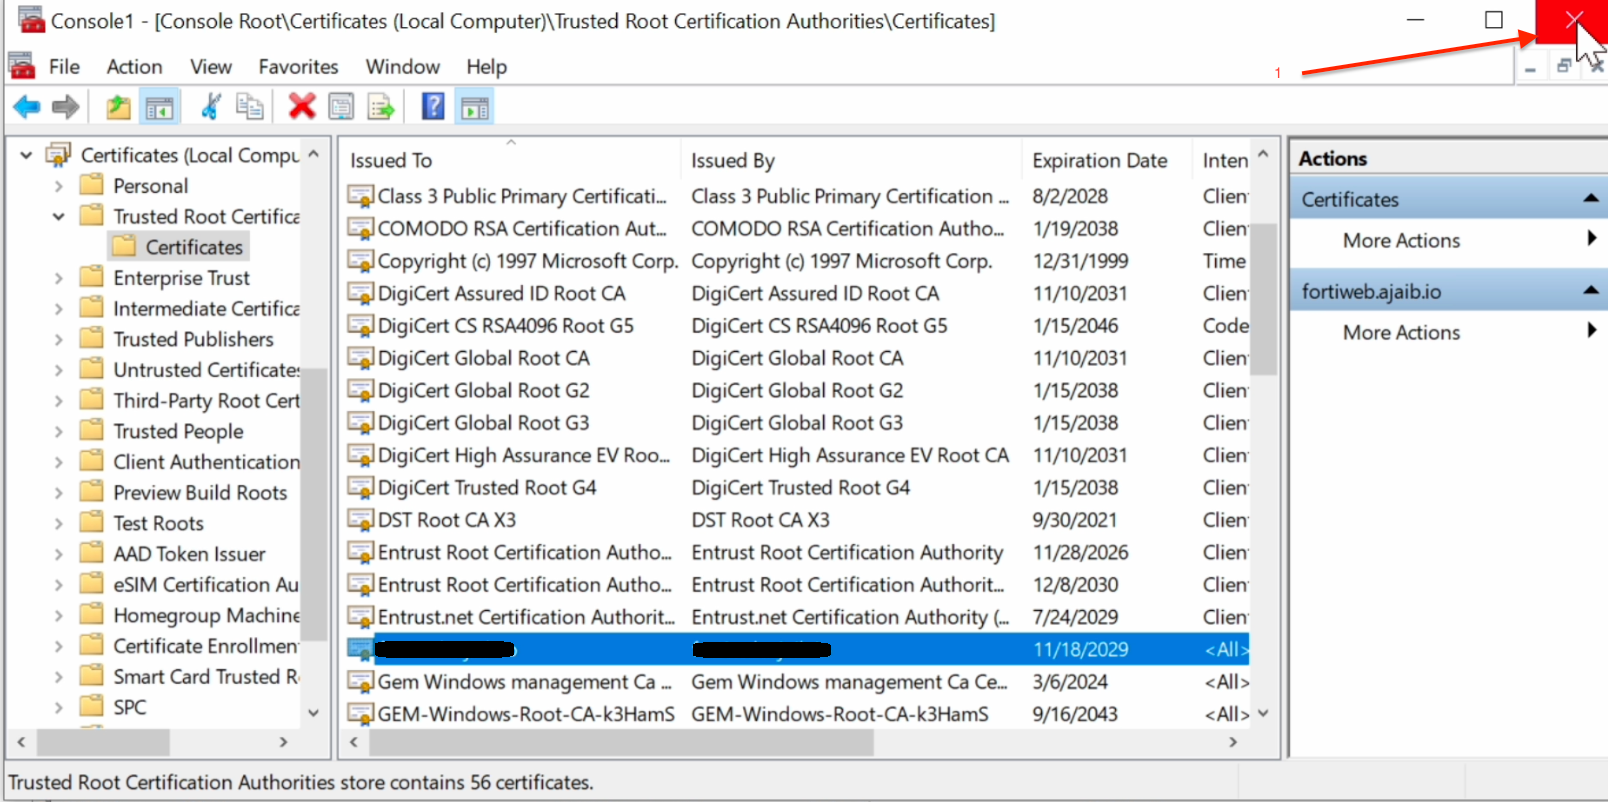
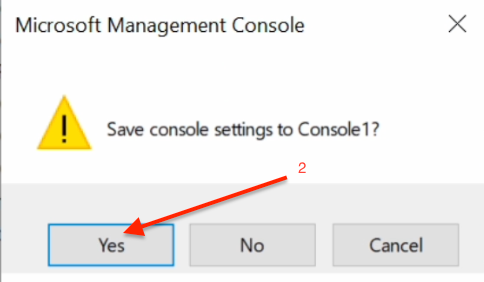
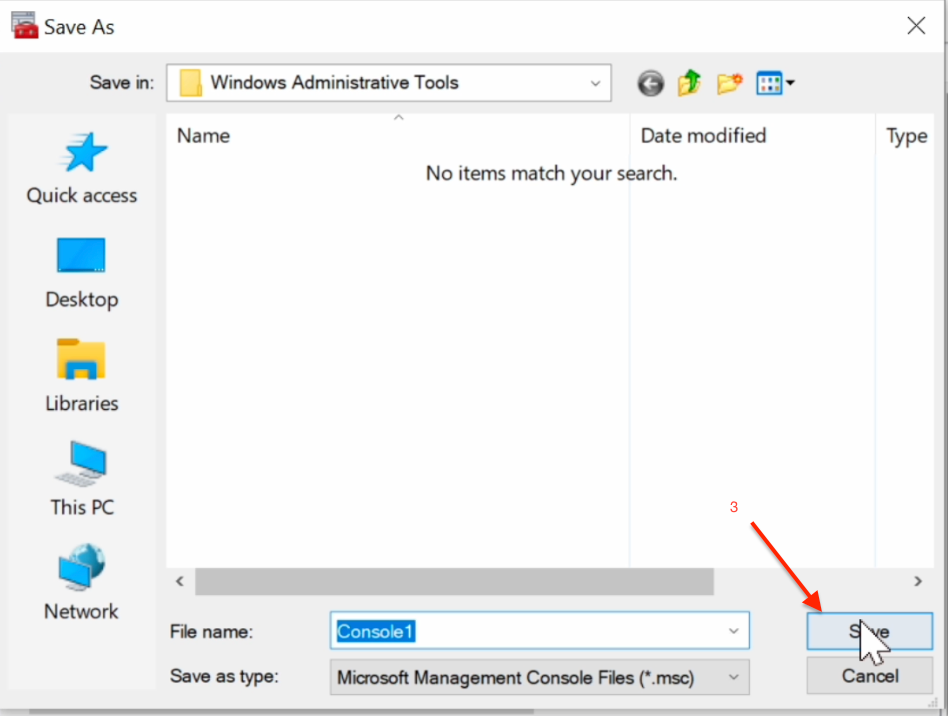
Once verified, close the Console1 dialog. If prompted to save the console, click Yes, and save it with an appropriate name.
Setting Up Certificates on MacBook
If you’re using macOS, the process is slightly different but just as simple. This setup ensures that your Mac trusts your proxy’s certificate, preventing security errors when browsing the web.
Press ⌘Command + Space to open Spotlight Search.

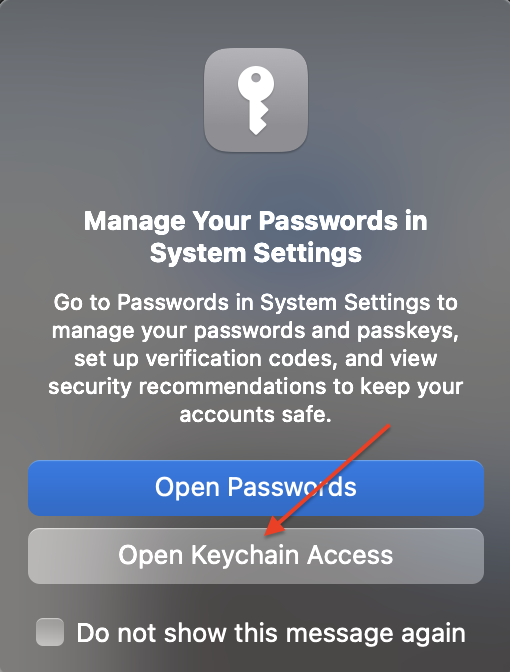
Type Keychain Access and press Enter. Then, select Open Keychain Access to open it.

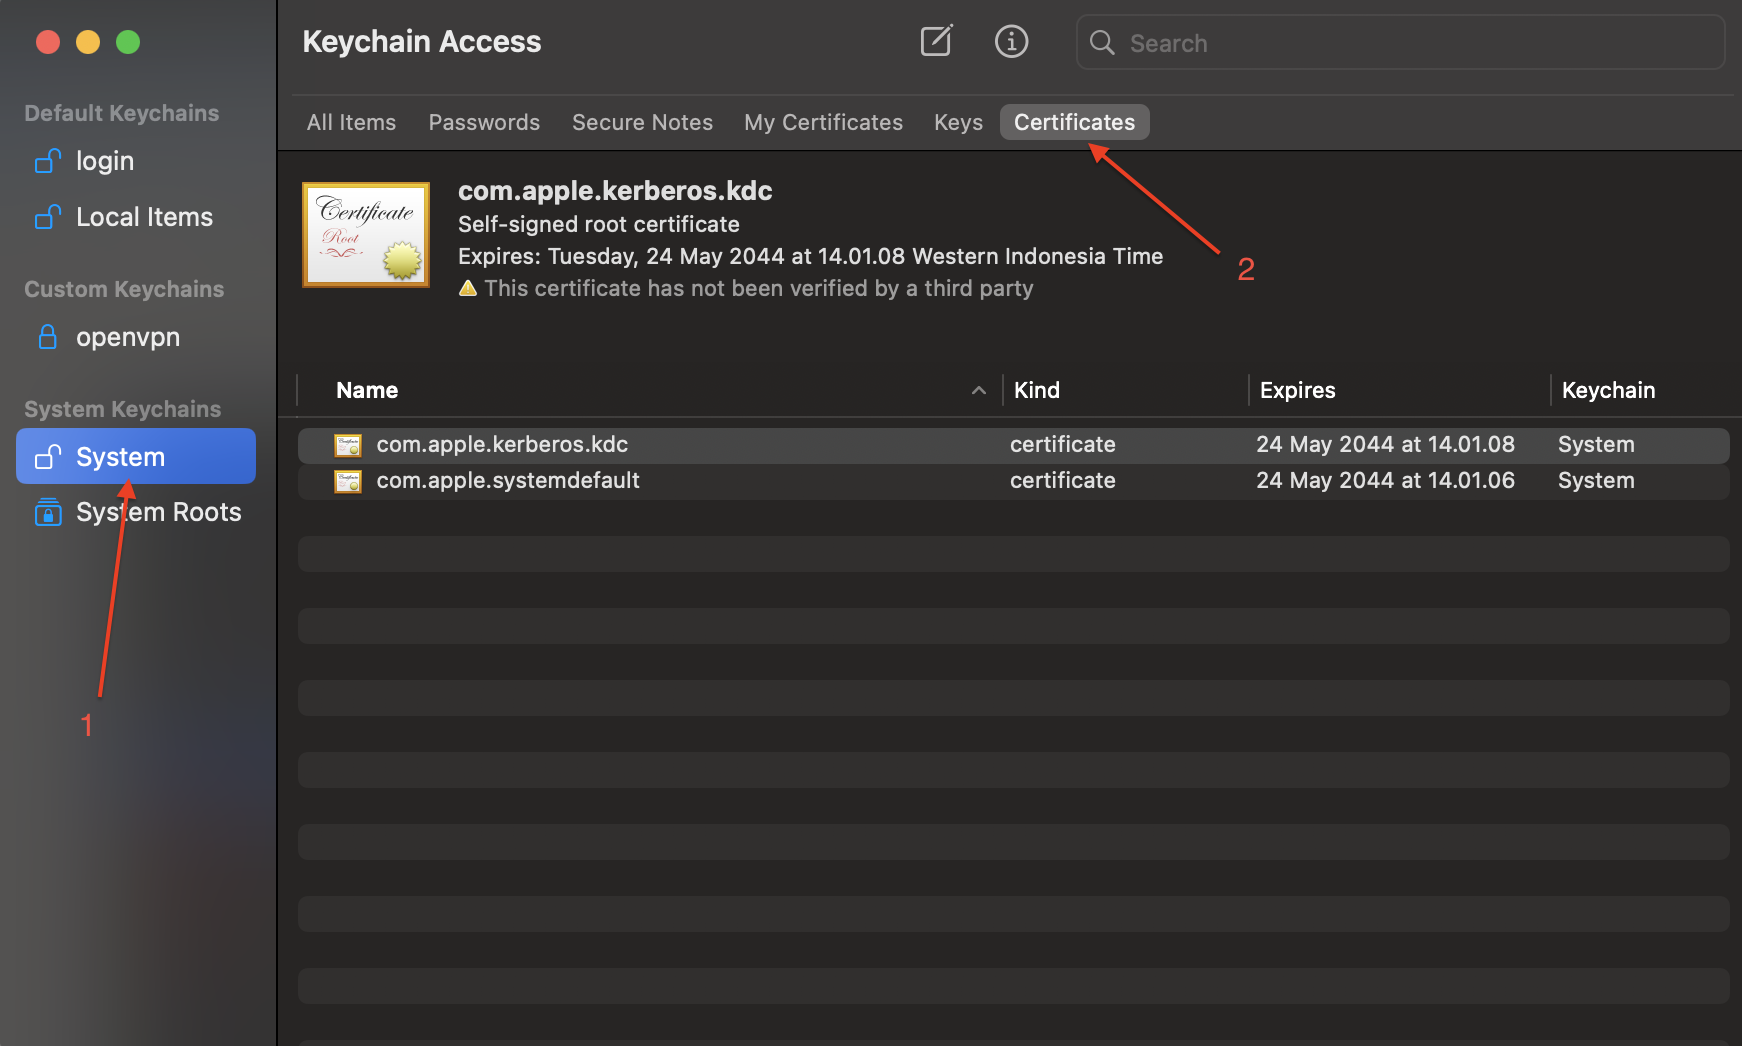
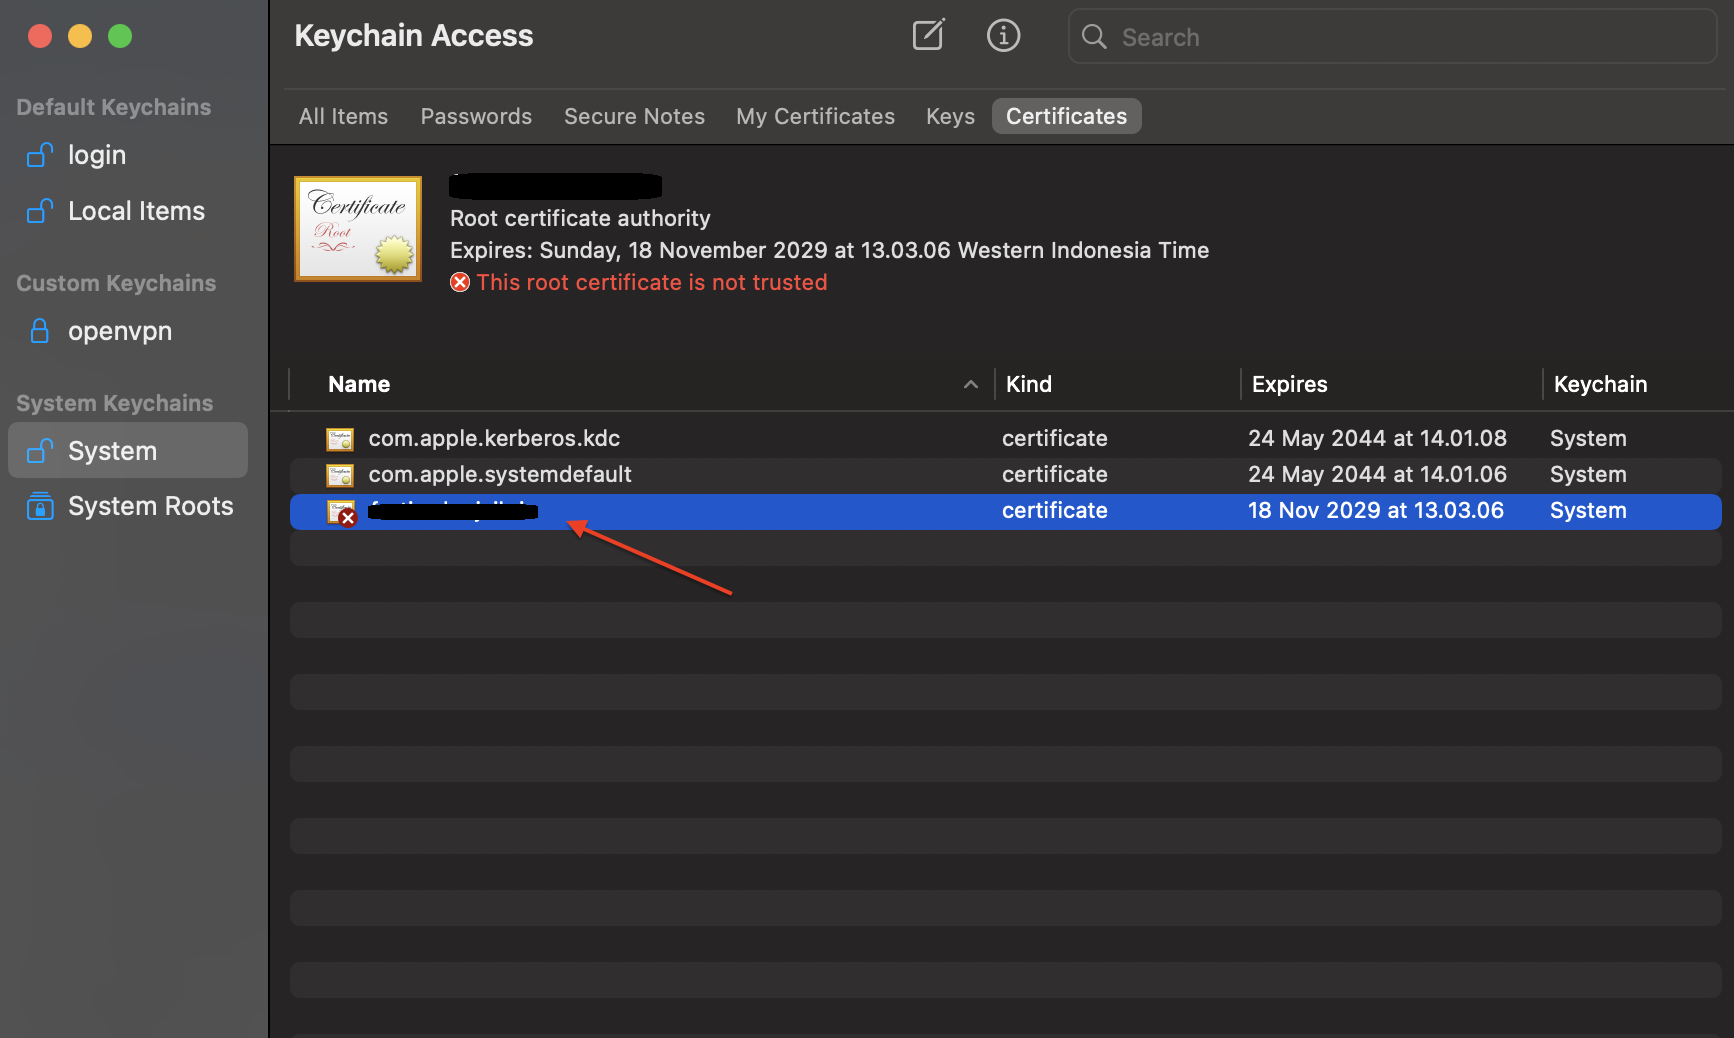
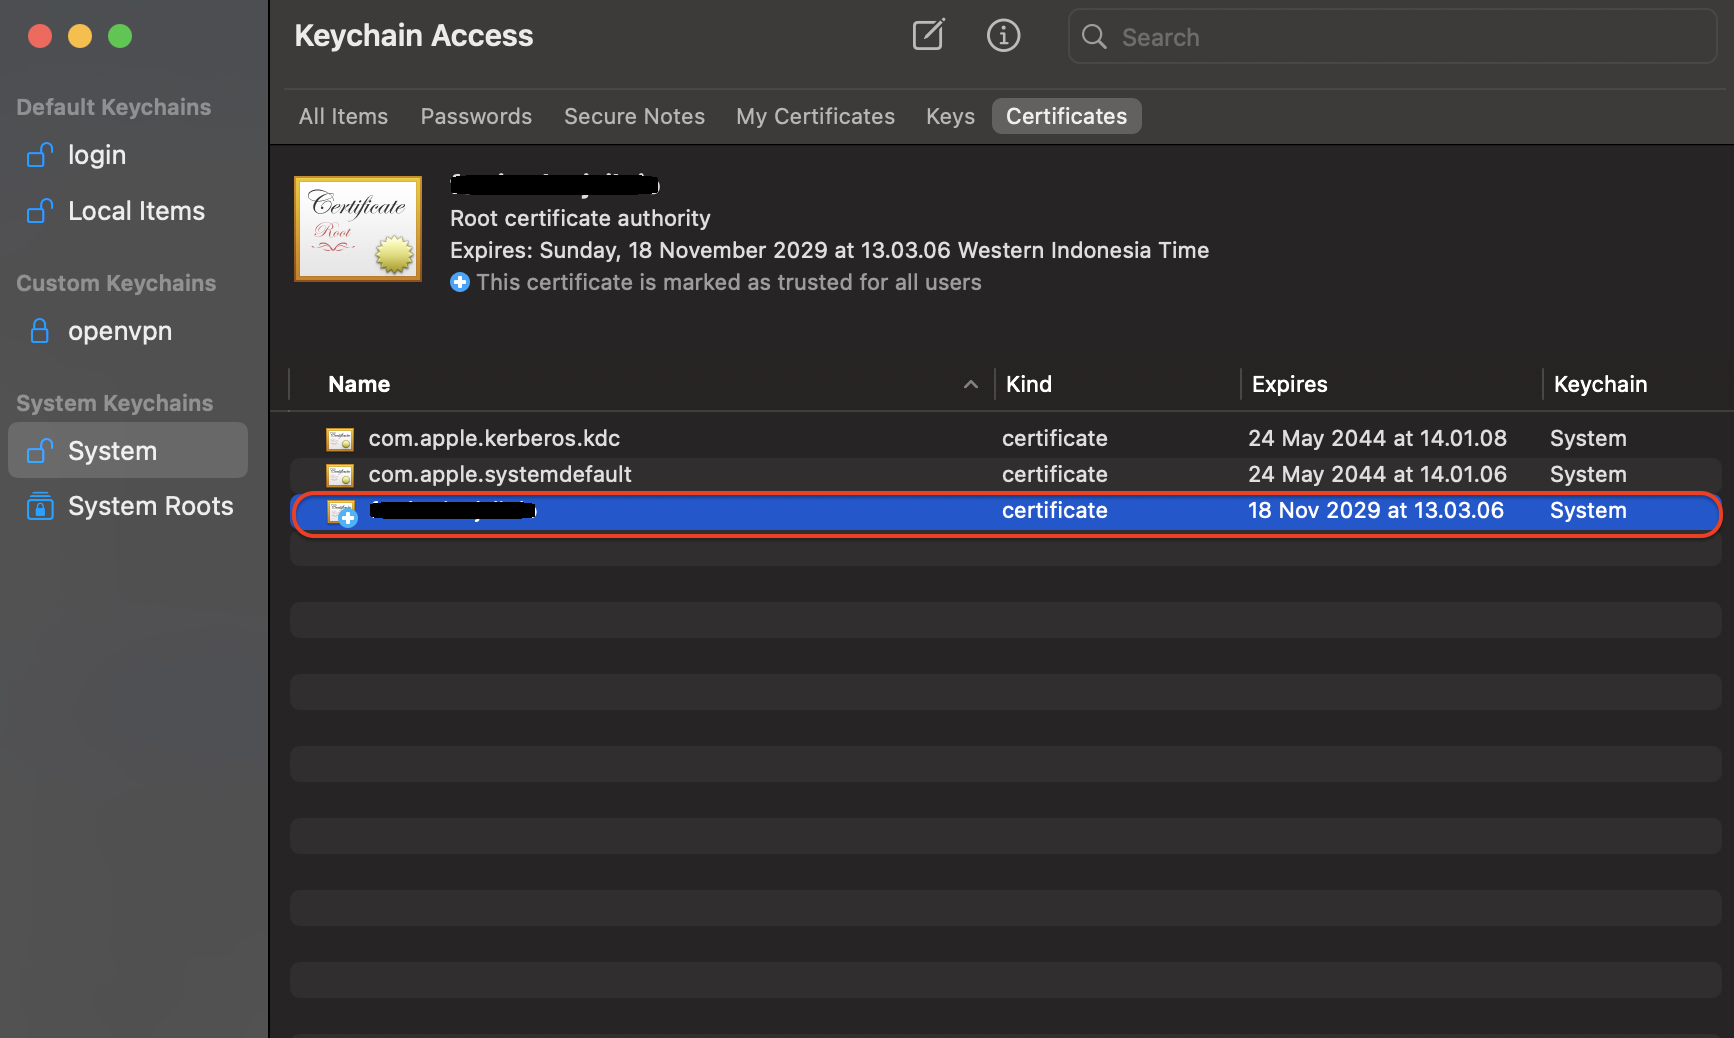
In Keychain Access, select the System → Certificates tab.
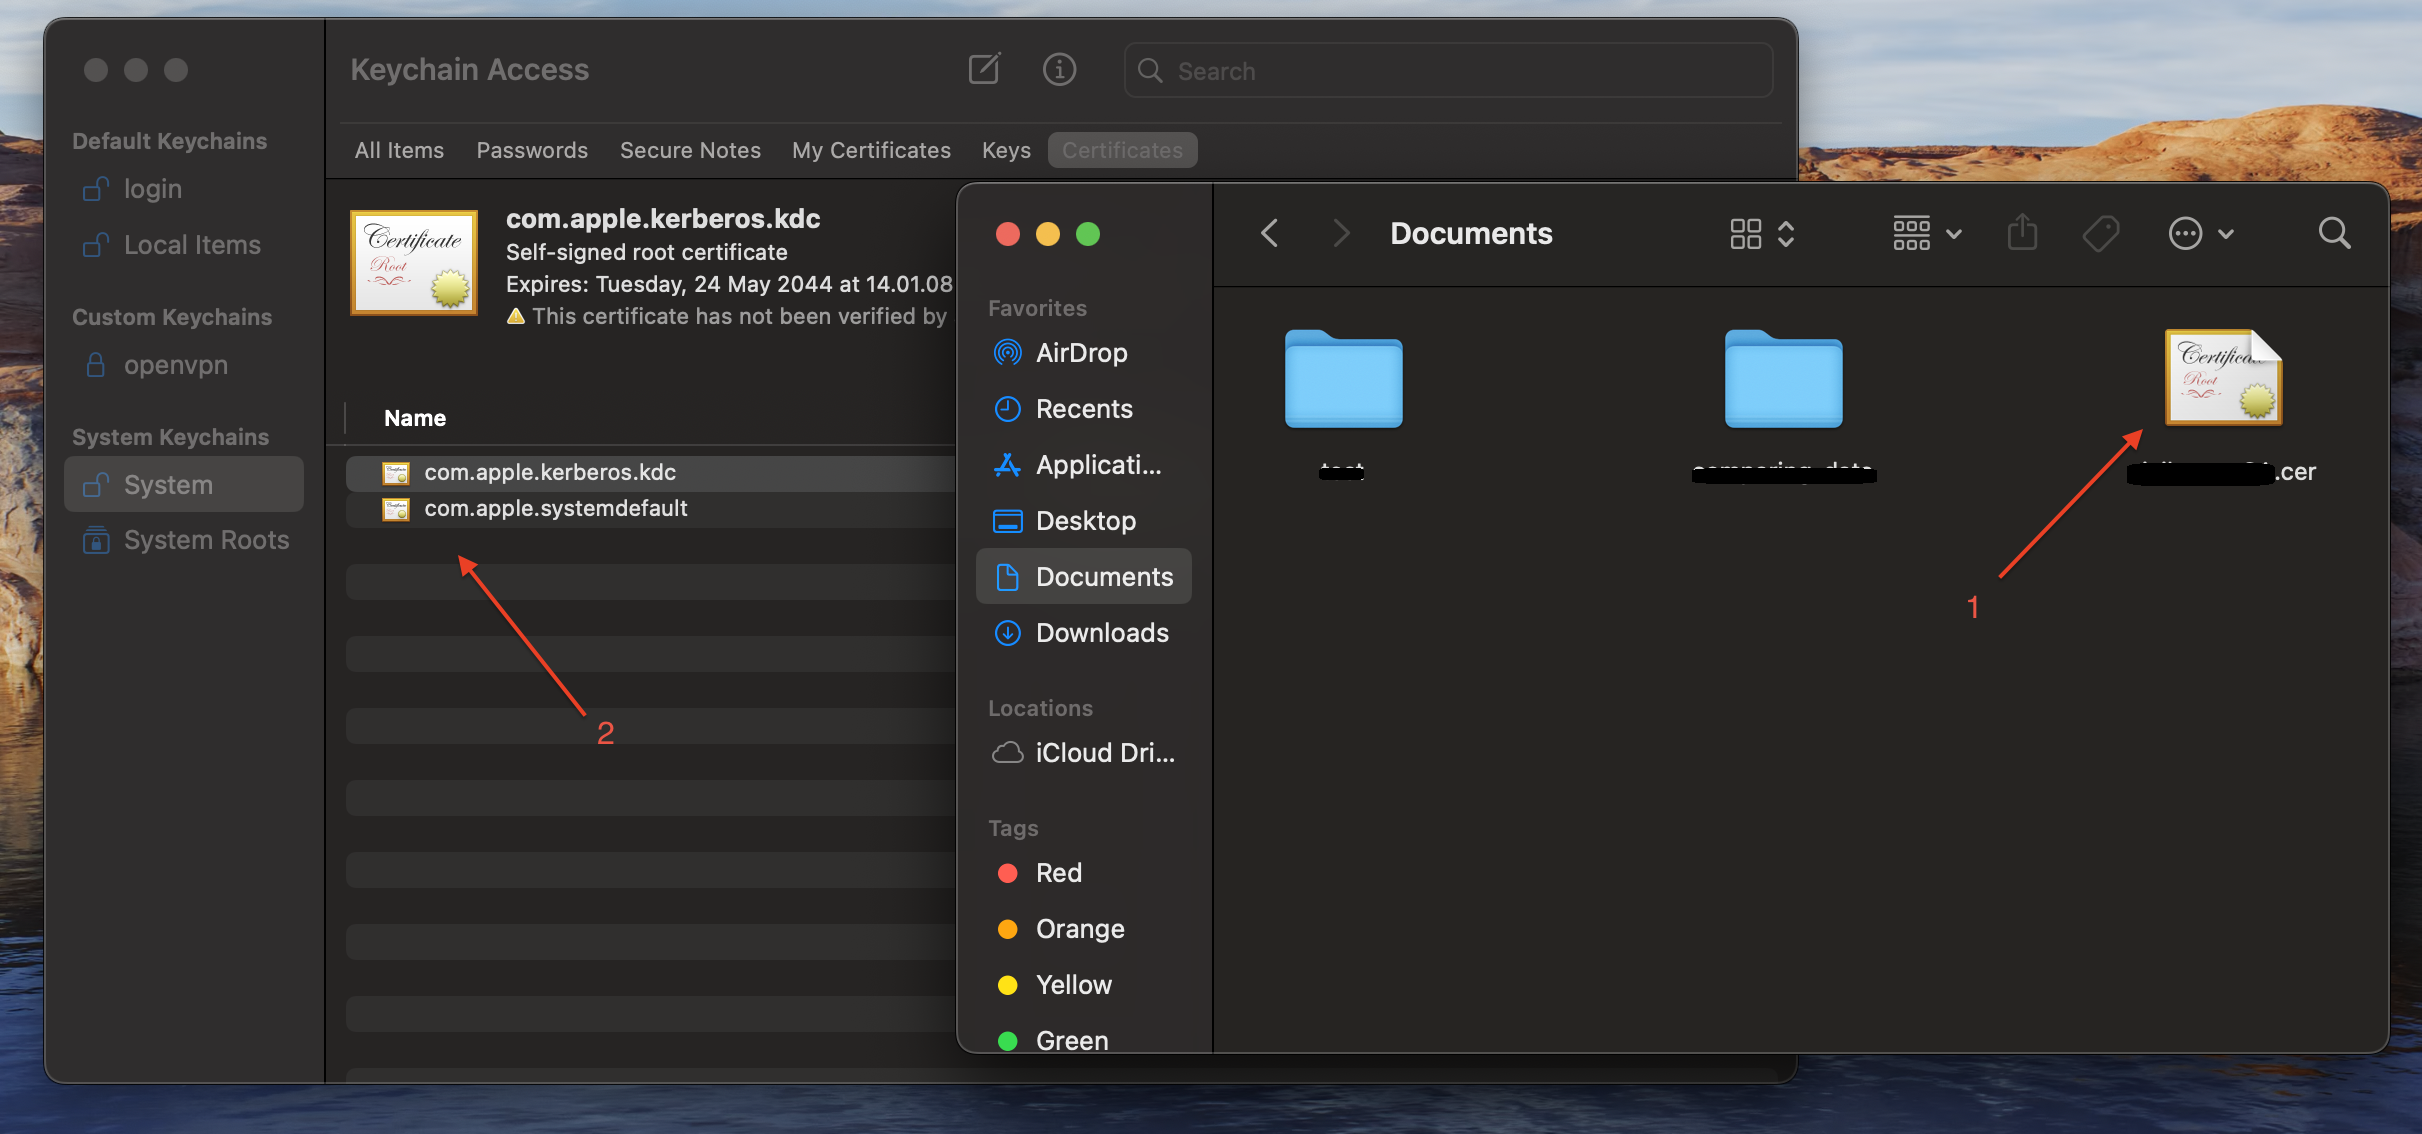
Drag and drop the downloaded certificate file into Keychain Access.
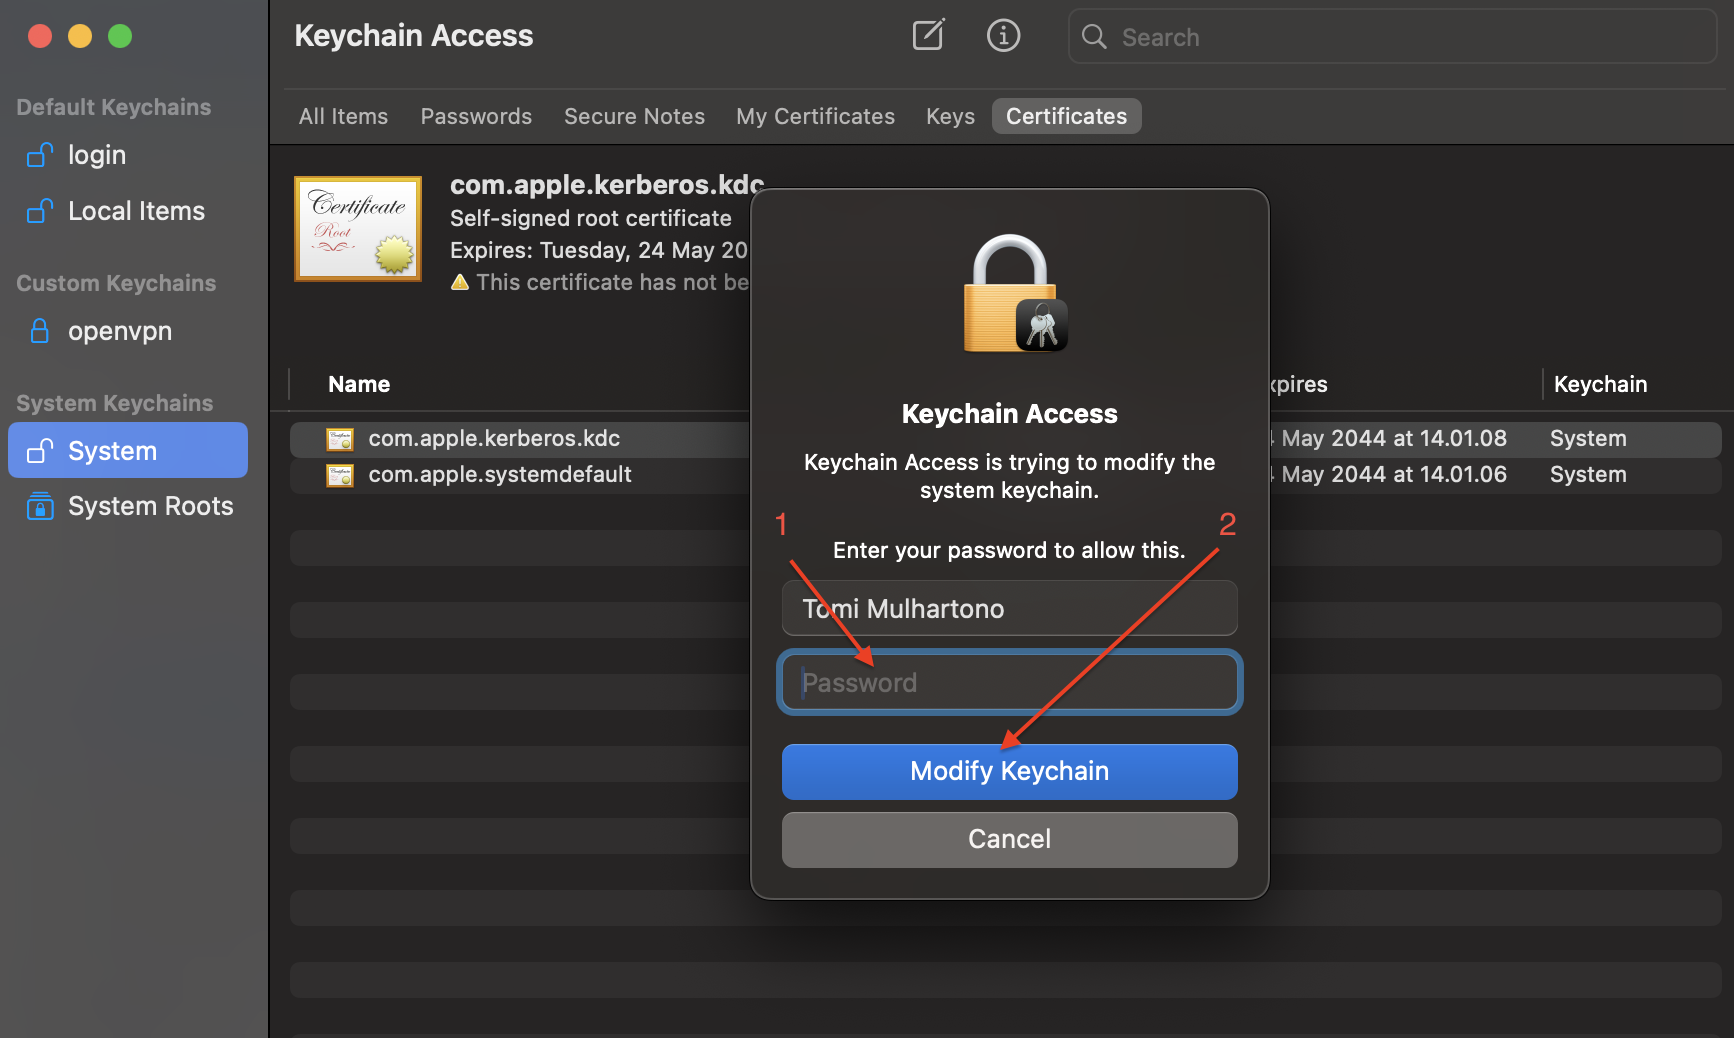
Enter your Mac login password when prompted.
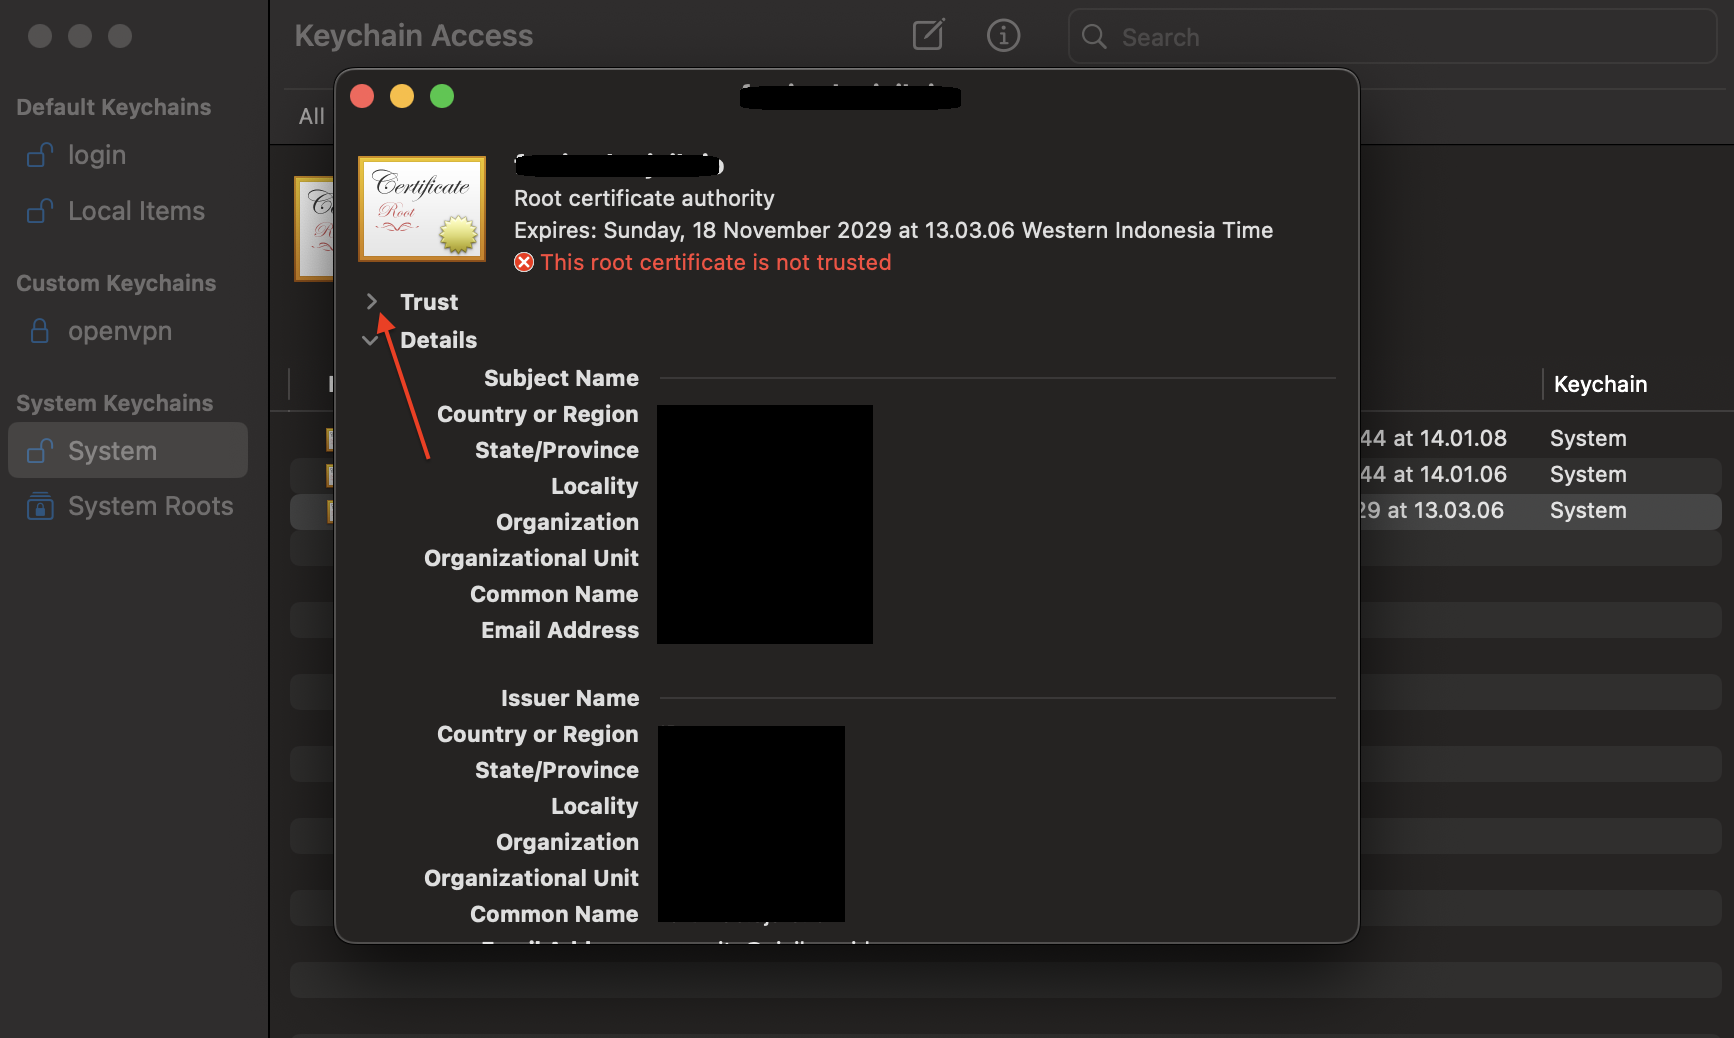
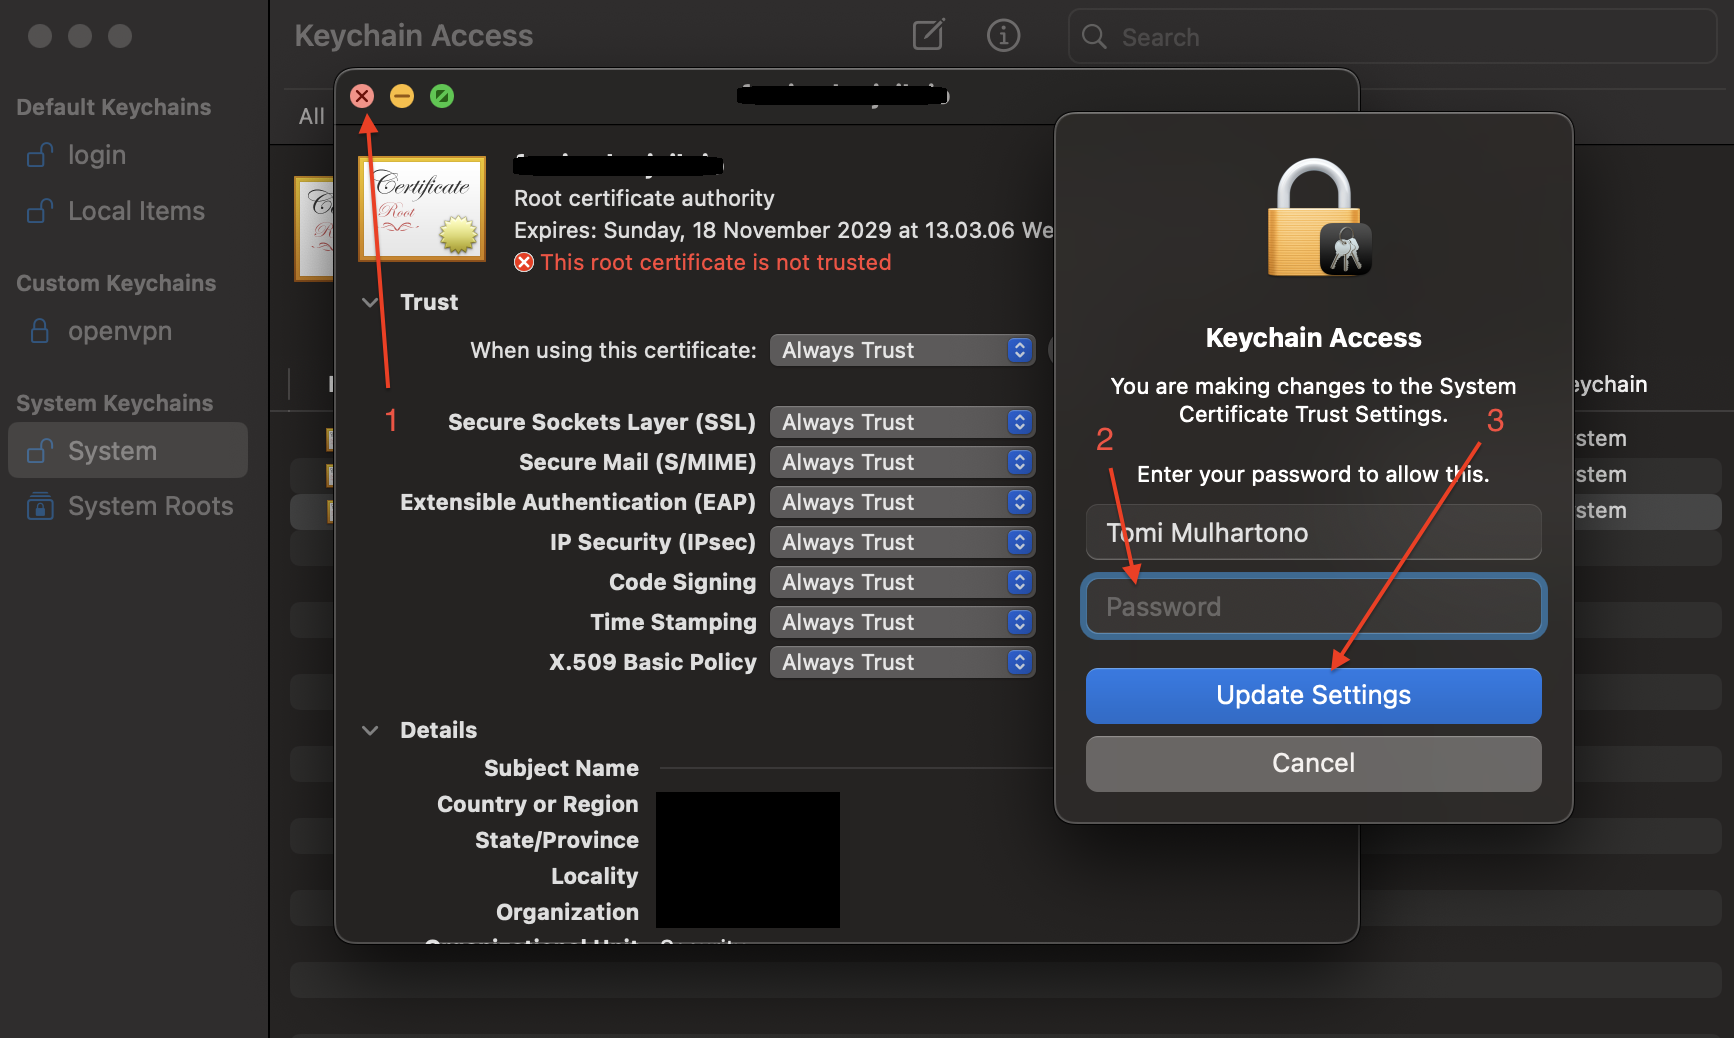
Double-click the added certificate to open its details.
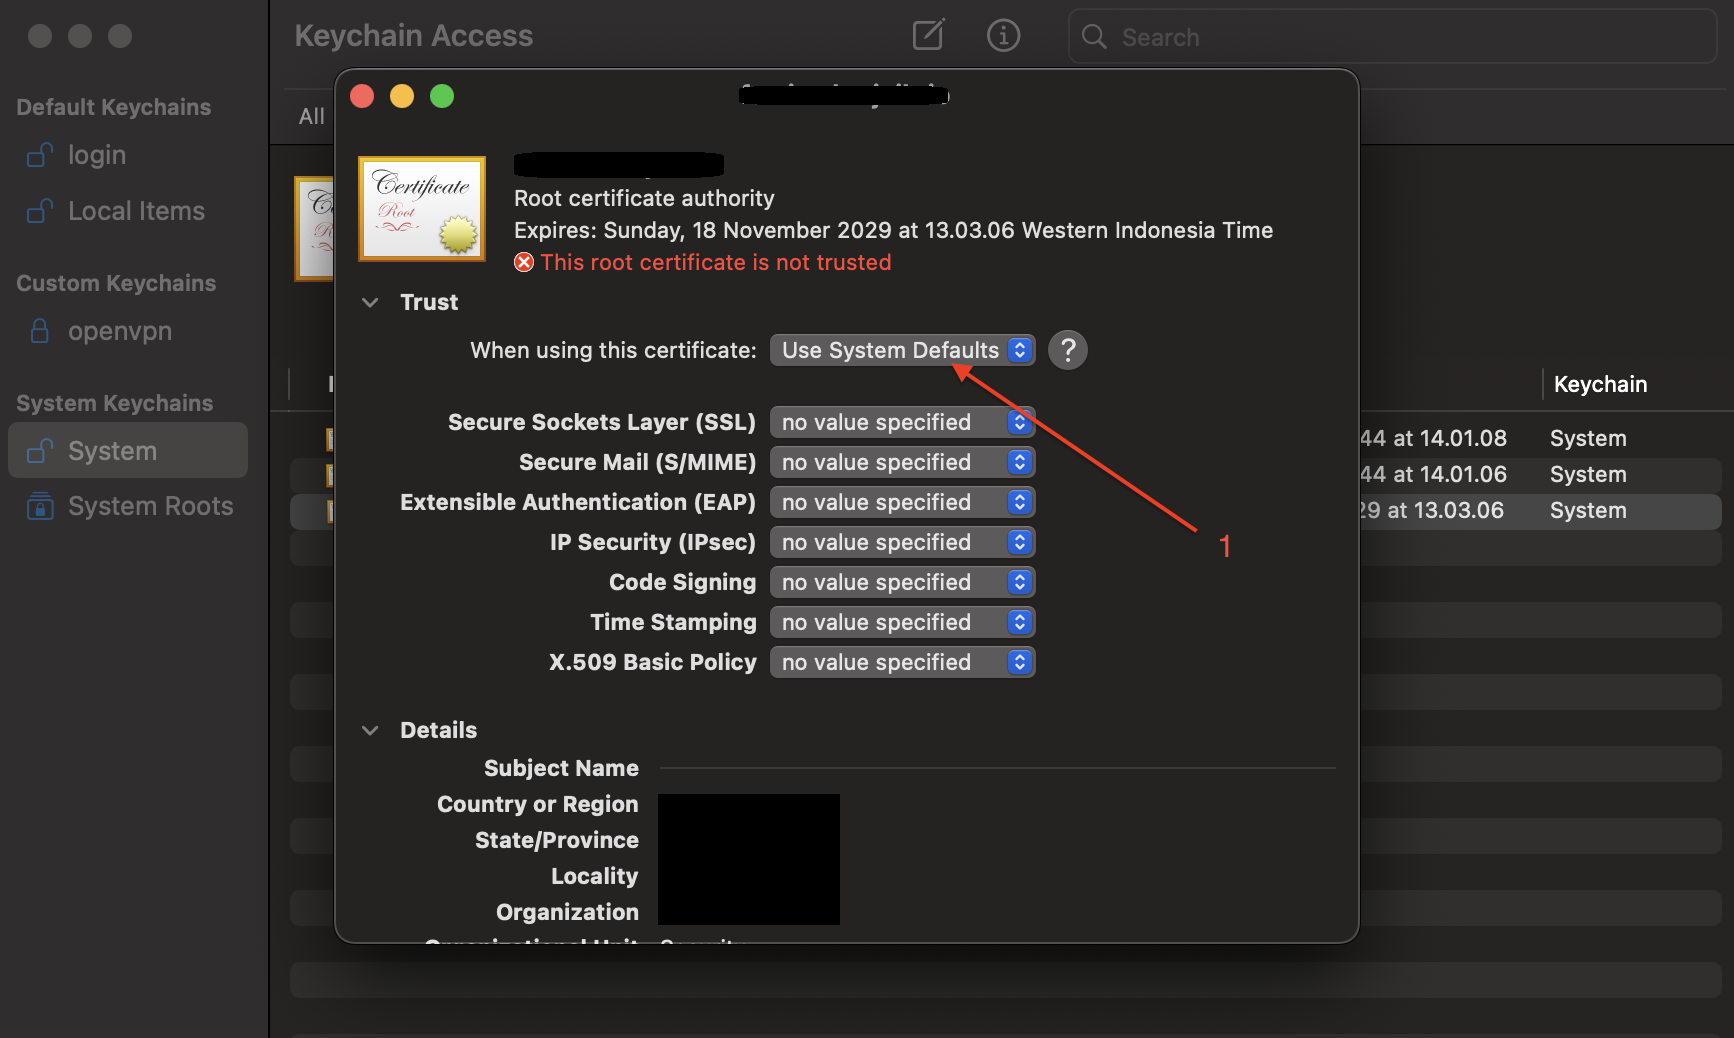
In the certificate details, expand the Trust section.
Set the certificate to Always Trust.
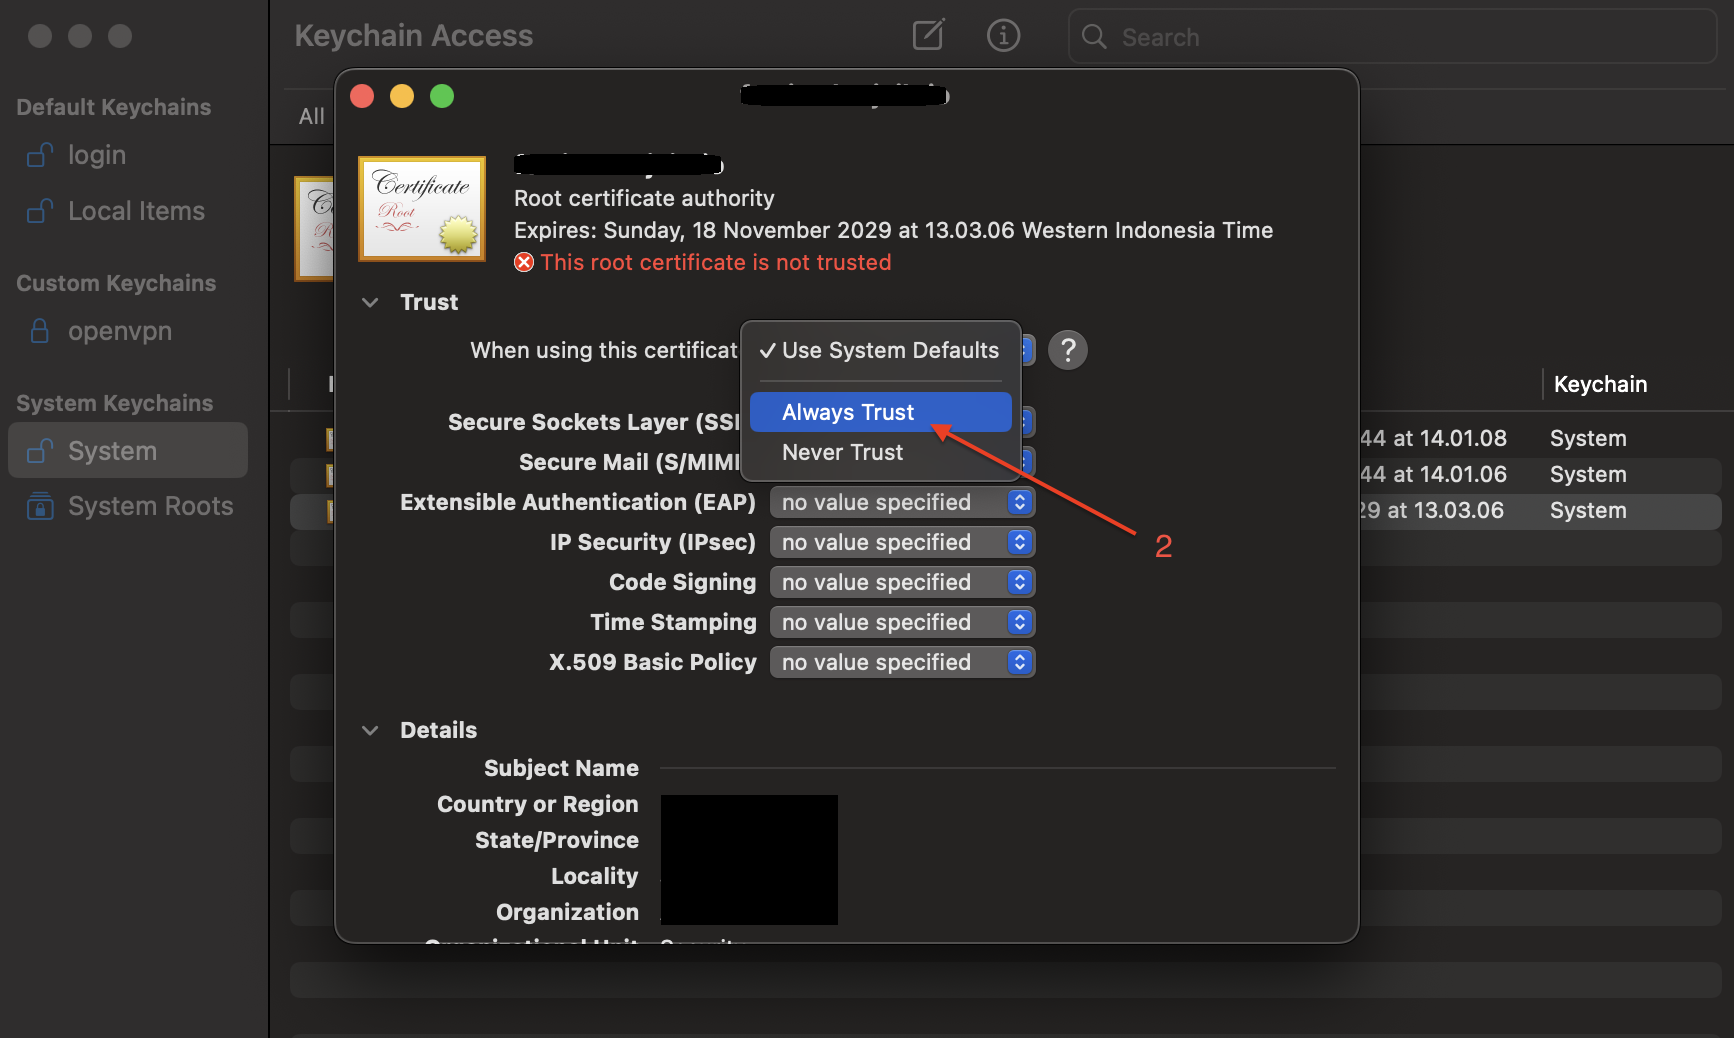
Close the certificate details and enter your Mac password again to save the changes.
The certificate setup is now complete.
By following this guide, you’ve successfully installed a trusted root certificate on both Windows and macOS. This allows your proxy server to function properly without triggering security warnings.
Now you’re all set! You can proceed with configuring your proxy server and web filtering setup.