Welcome aboard! If you’re gearing up to launch a new application on OpenResty Edge, you’re in the right place. Whether you’re a seasoned pro or just starting out, I’ll walk you through every step of the way with a dash of fun. Grab your favorite drink, settle in, and let’s dive into this setup adventure!
What is OpenResty Edge?
OpenResty Edge is a powerful platform designed to manage and deliver your applications at the edge, optimizing performance, scalability, and security. It allows you to deploy and configure applications in a fast, flexible, and efficient way, using advanced features like traffic routing, custom rules, and SSL management. With OpenResty Edge, you can easily manage traffic, enhance security, and ensure smooth user experiences for your applications at scale.
Let’s Get Started!
Step 1: Creating Your New Application
Let’s get that new app live and kicking! Here’s how to create your first application on OpenResty Edge.
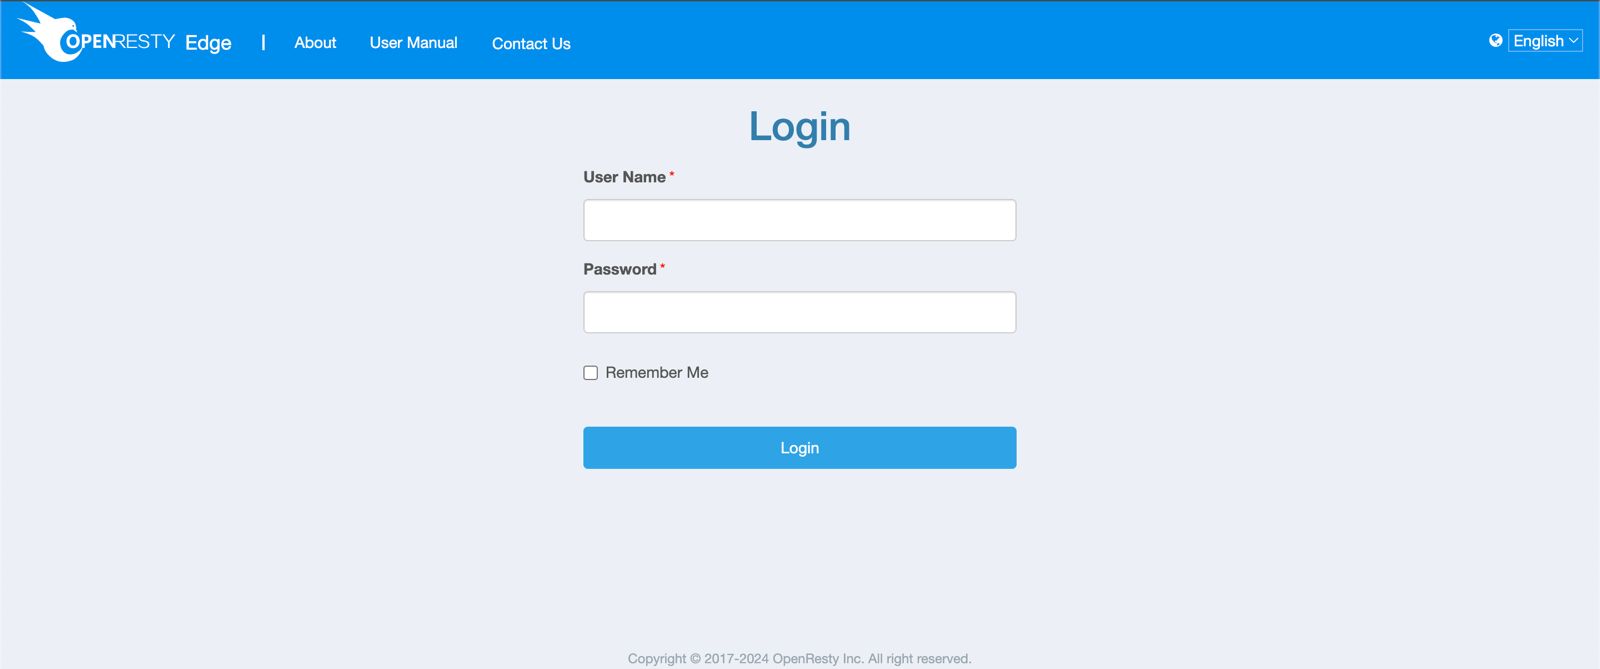
Login to Your OpenResty Edge Dashboard
Head over to the OpenResty Edge dashboard and log in using your credentials.
Navigate to the Applications Section
Once you’re logged in, click on Applications from the top menu.
Inside the Applications section, click on the Create New App button to start the process.

Fill Out the Application Details
Here’s a breakdown of the fields you’ll encounter:
- Domains: Enter your domain name here (e.g.,
tomi-example.co.id). - HTTP Port: You can leave this blank for now.
- HTTPS Port: Set to
443for secure traffic. - Label: Give your app a memorable label, like
Create a New Example App.
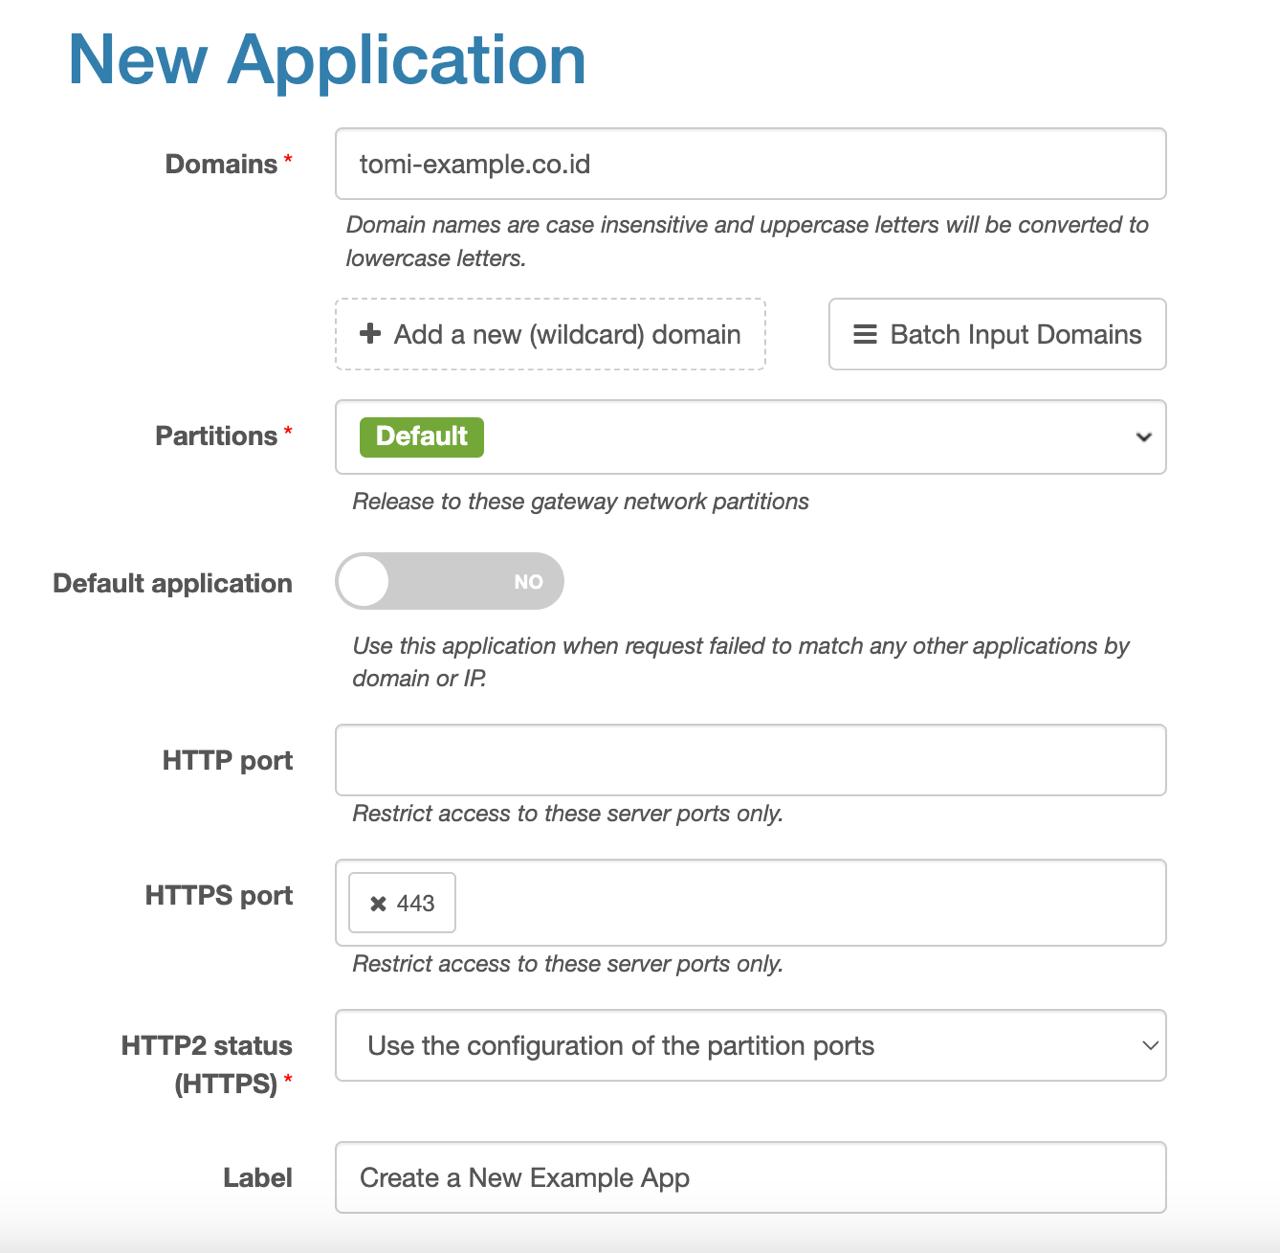
- Domains: Enter your domain name here (e.g.,
Once you’ve filled everything out, click Save!
Step 2: Configuring Page Rules
Now, let’s configure some important rules to control how traffic behaves for your application.
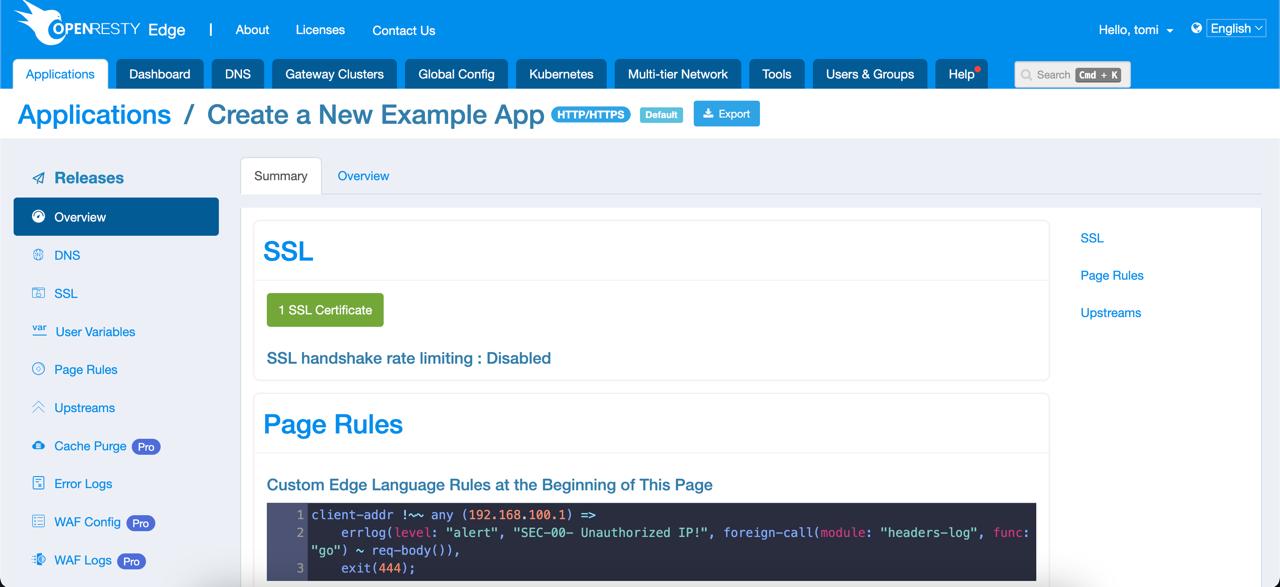
Custom Edge Language Rules at the Beginning of This Page
To block specific IPs and log alerts, use the following rule:
client-addr !~~ any (192.168.100.1) =>
    errlog(level: "alert", "SEC-00- Unauthorized IP!", foreign-call(module: "headers-log", func: "go") ~ req-body()),
    exit(444);
This rule does two things:
- Blocks traffic from the IP
192.168.100.1. - Logs an alert with the message “Unauthorized IP!”.
- Blocks traffic from the IP
After adding your custom rules, click Save.
Create New Rules
Let’s move on to setting up some common rules you’ll probably need.
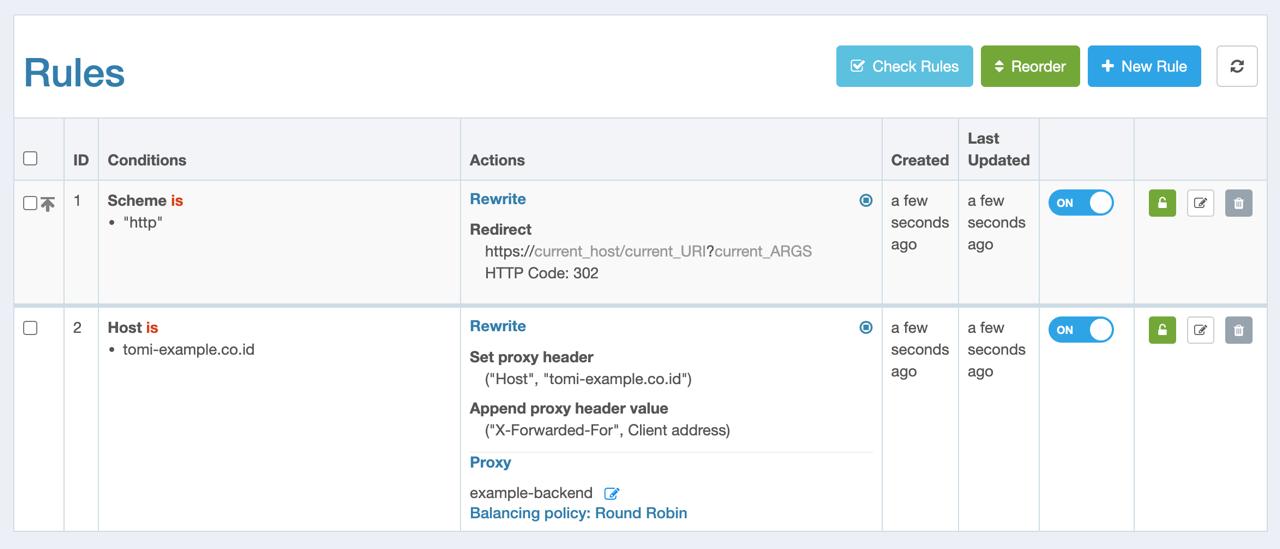
Redirect HTTP to HTTPS
To enhance security, redirect all HTTP traffic to HTTPS:
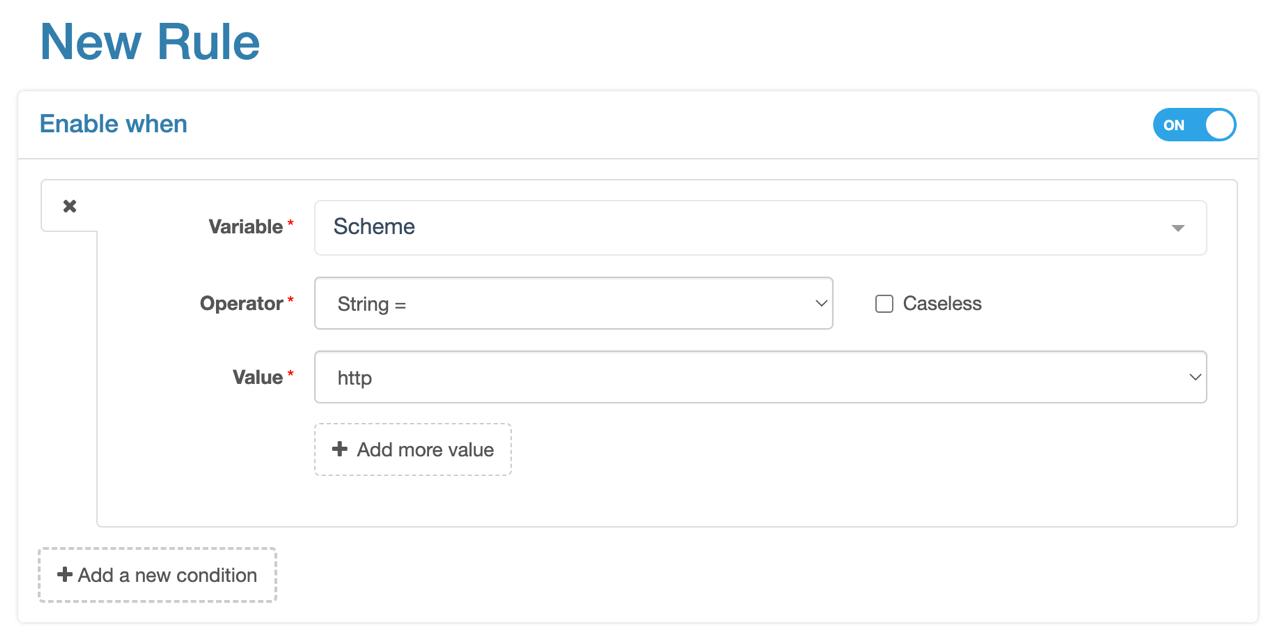
Click New Rule in the Page Rules section.
Set up the condition:
- When → Add a new condition:
- Variable → Scheme
- Operator → String =
- Value → http
Add the action:
Action Type → Redirect
Set the following fields:
URI → Choose current.
Scheme → Set this to https.
Status Code → Set to 302 Moved Temporarily.
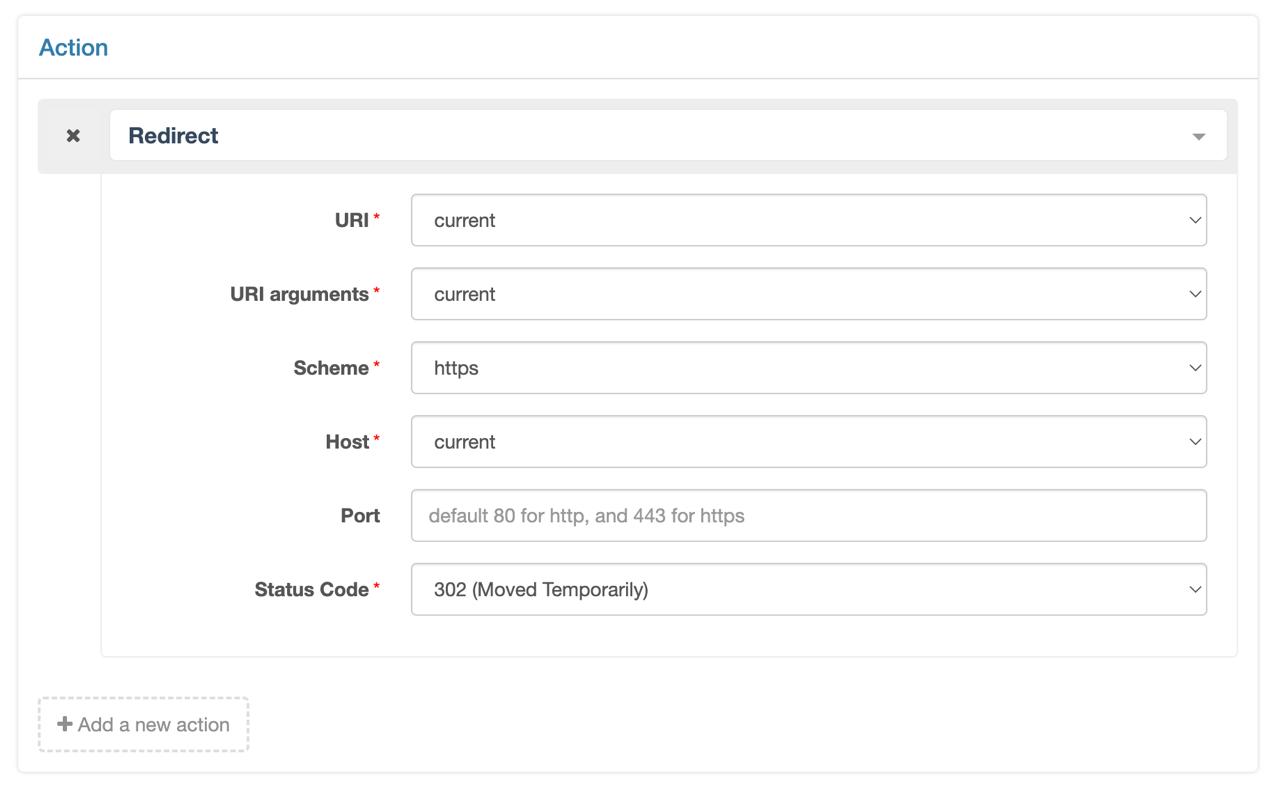
This will ensure all users trying to access your site via HTTP will be securely redirected to HTTPS.
Set Proxy Header
If you need specific headers to be passed to the backend server:
Click New Rule again.
In the When section, add a new condition for Host:
Variable → Host
Value → Your domain (e.g.,
tomi-example.co.id).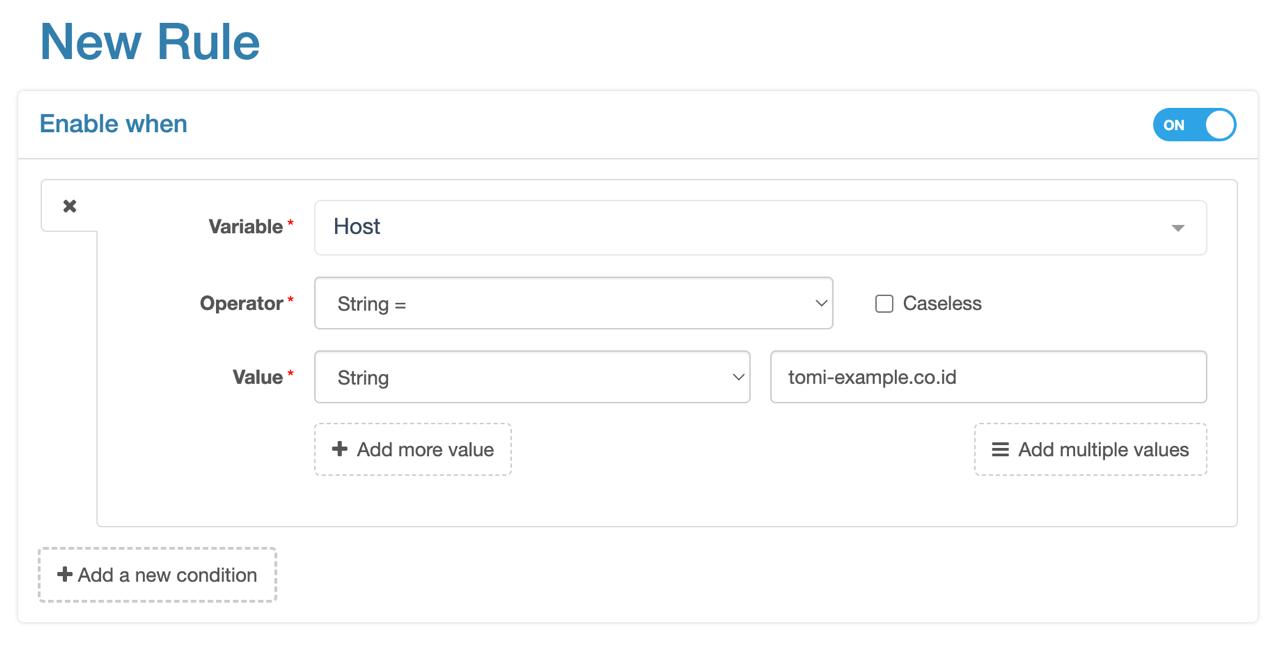
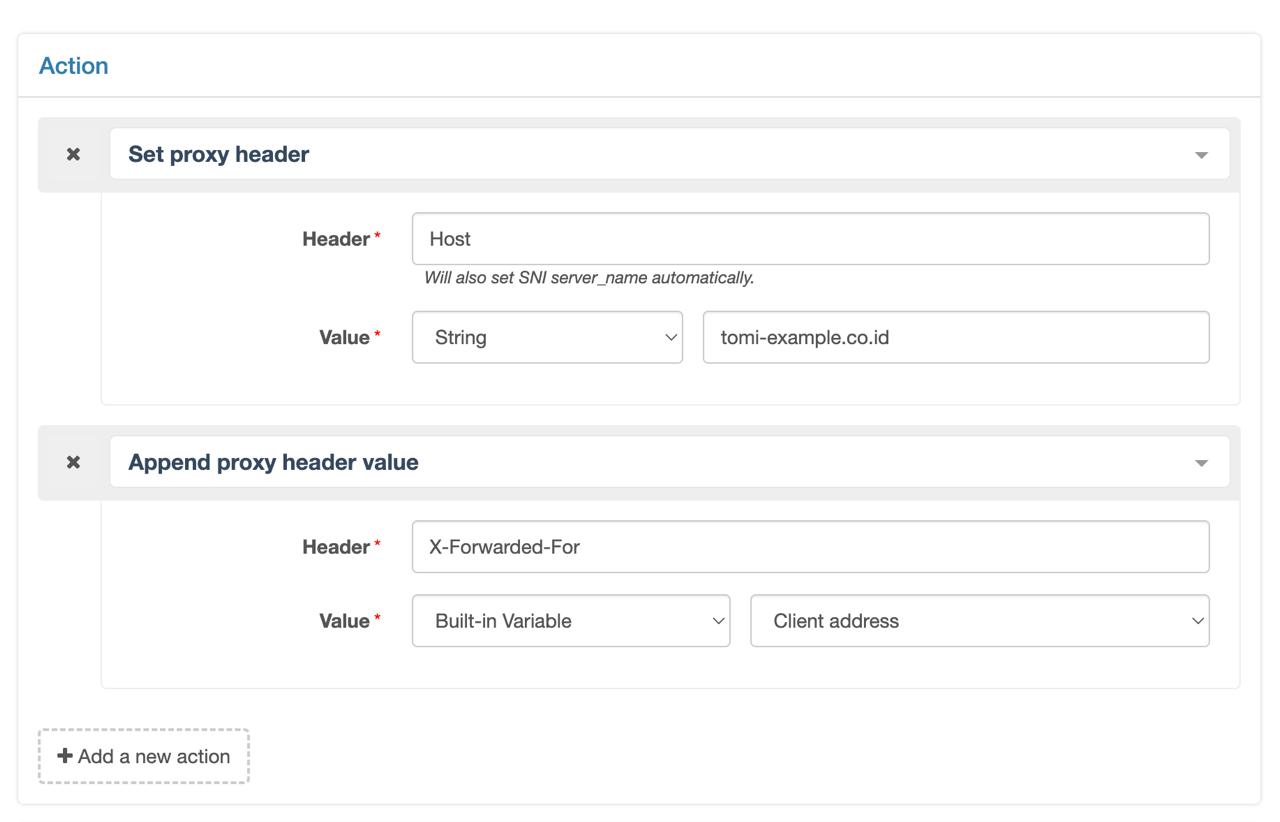
Add the following actions:
Set Proxy Header: Set the Host header with your domain name.
Append Proxy Header: Append the X-Forwarded-For header with the client address.
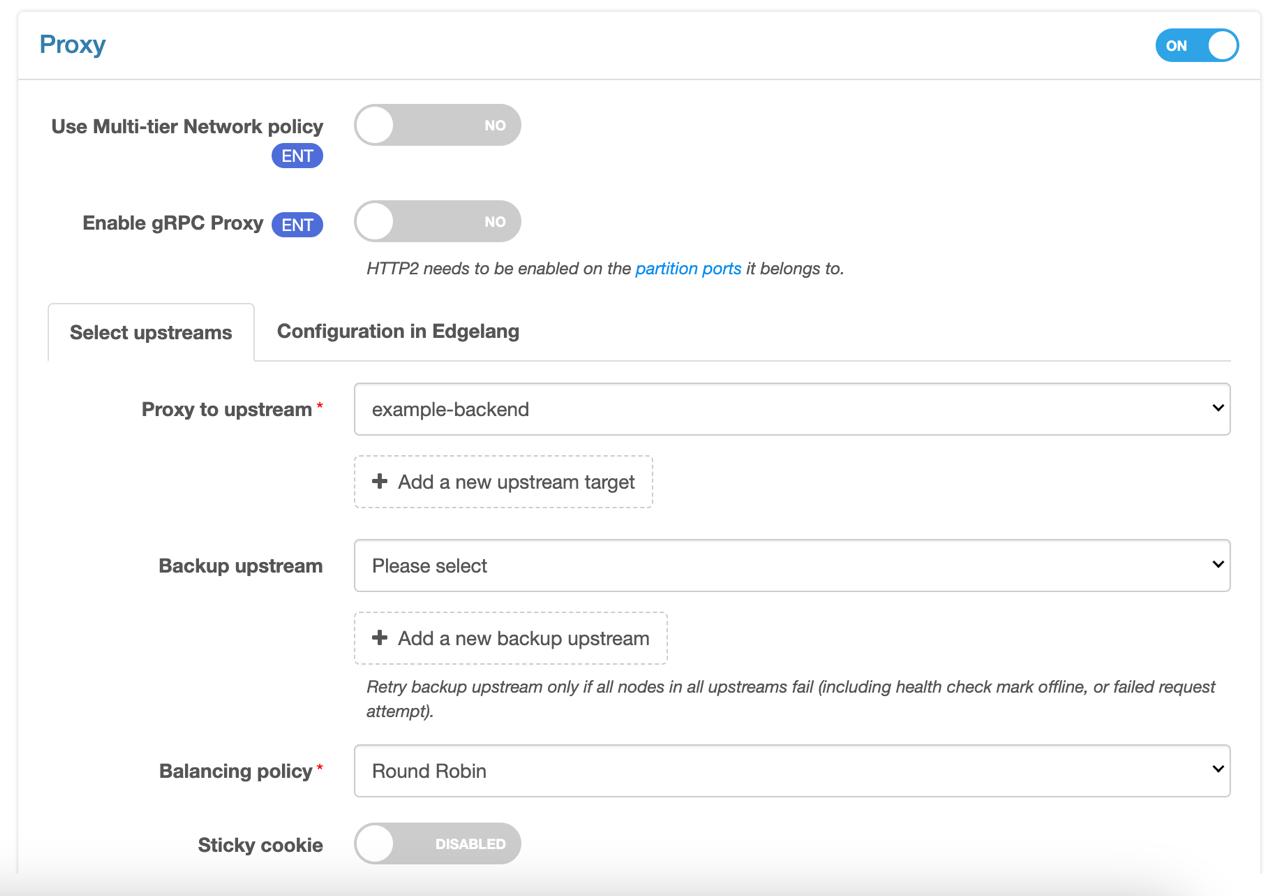
Under Proxy settings, turn Proxy On and select the upstream server you created earlier.
Custom Edge Language Rules at the End of This Page
Wanna speed up your site? Caching static files like JavaScript, CSS, and images is a great way to do that. Here’s the rule you need to add:
uri-suffix(
rx:s/\.(?:js|css|xml).{0,3}$/),
req-method("GET")=>
    enable-proxy-cache(key: uri),
    enforce-proxy-cache(7 [day]),
    set-resp-header("Cache-Control", "public, max-age=604800, immutable");
uri-suffix(
rx:s/\.(?:gif|png|js|css|html|jpg|wof|svg|woff2|ttf|otf|eot|ico).{0,5}$/),
req-method("GET")=>
    enable-proxy-cache(key: uri),
    enforce-proxy-cache(365 [day]),
    set-resp-header("Cache-Control", "public, max-age=3153600, immutable");
Here’s the breakdown:
- JavaScript and CSS files: Cached for 7 days.
- Other files like images: Cached for 365 days.
- Cache-Control Header: Tells browsers to keep these files for the specified period, which helps make repeat visits faster.
Once you’ve added these caching rules, be sure to click Save to lock it in place.
Step 3: Configuring Upstreams
Next, let’s set up the backend server where your app will forward requests.
Go to the Upstreams Menu
- Click on Upstreams from your dashboard.
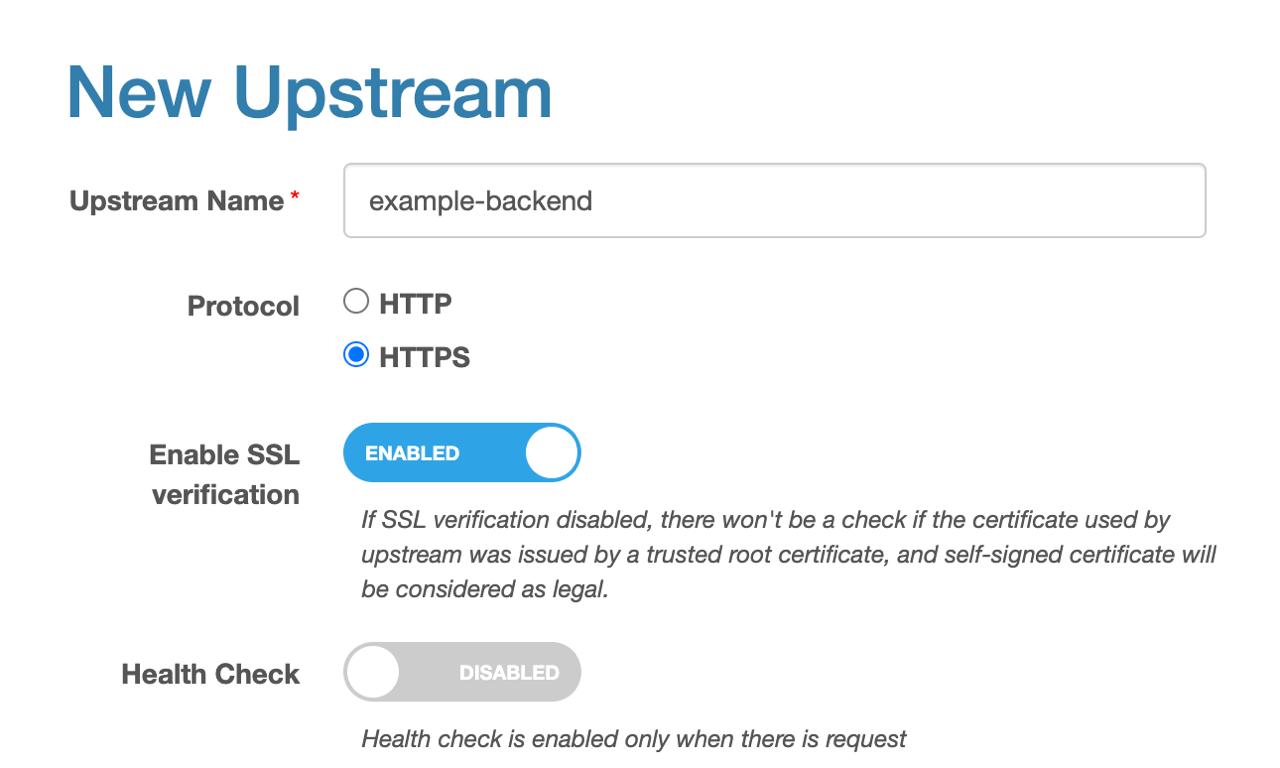
Add a New Upstream
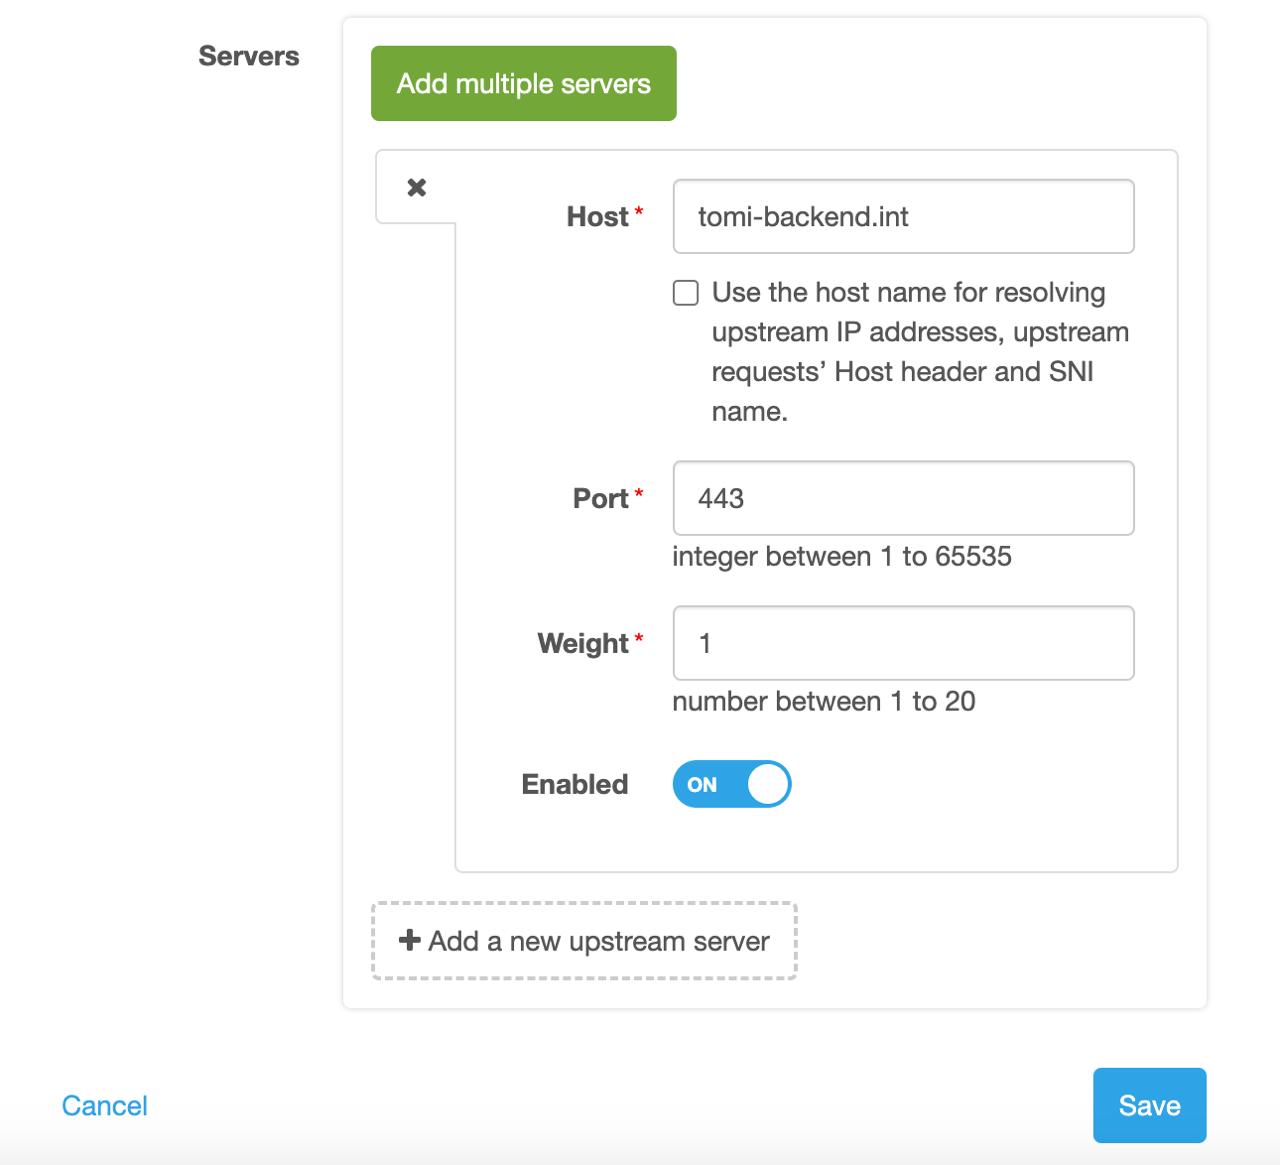
- Enter the following details:
Upstream Name: e.g.,
example-backend.Protocol: Select HTTPS.
Host: Enter your backend server domain or IP (e.g.,
tomi-backend.int).Port: Set to 443.
Weight: Set to 1.
Enabled: Switch this On.
- Enter the following details:
Save the Upstream
- Click Save to apply the settings.
Step 4: Configuring SSL
It’s time to secure your app with SSL! Here’s how to configure SSL certificates:
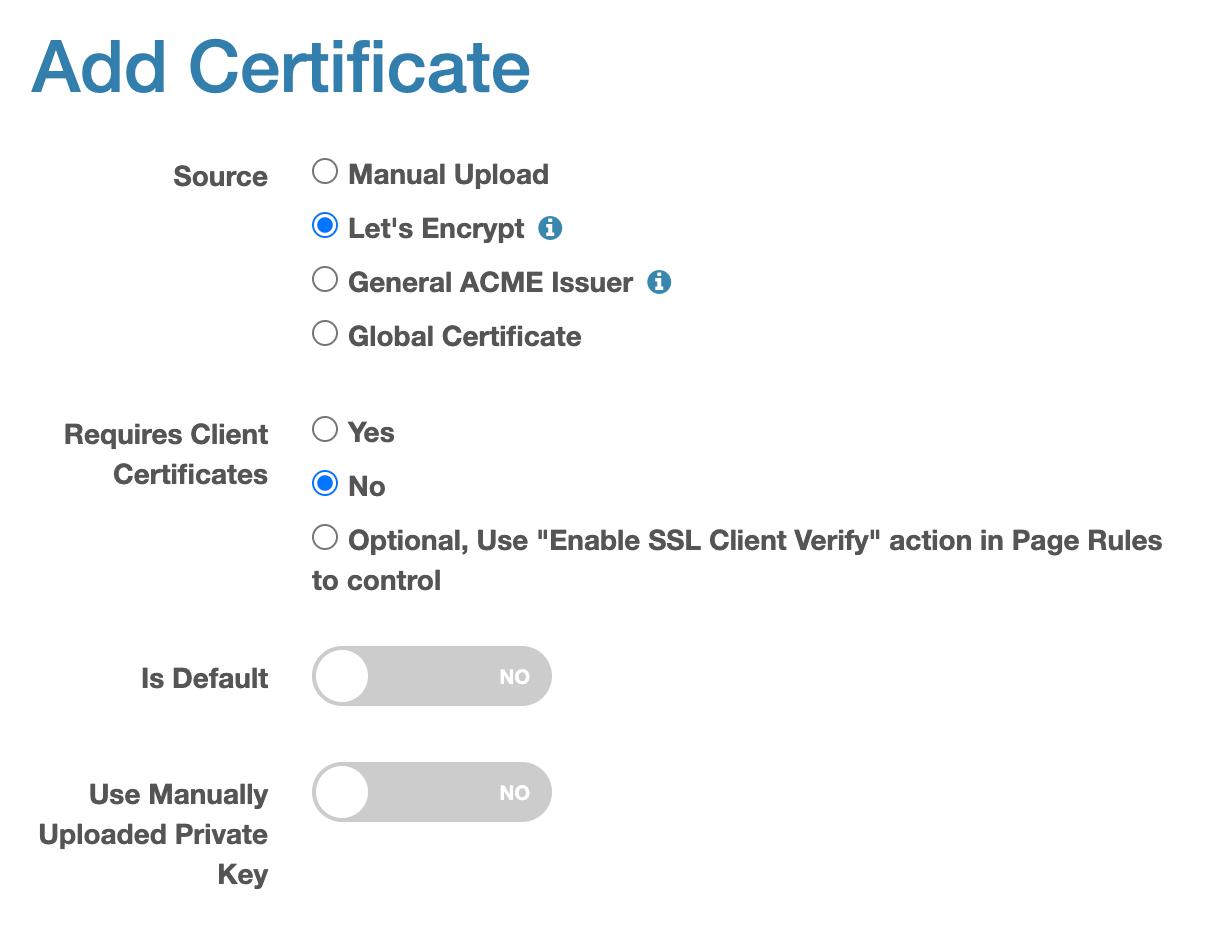
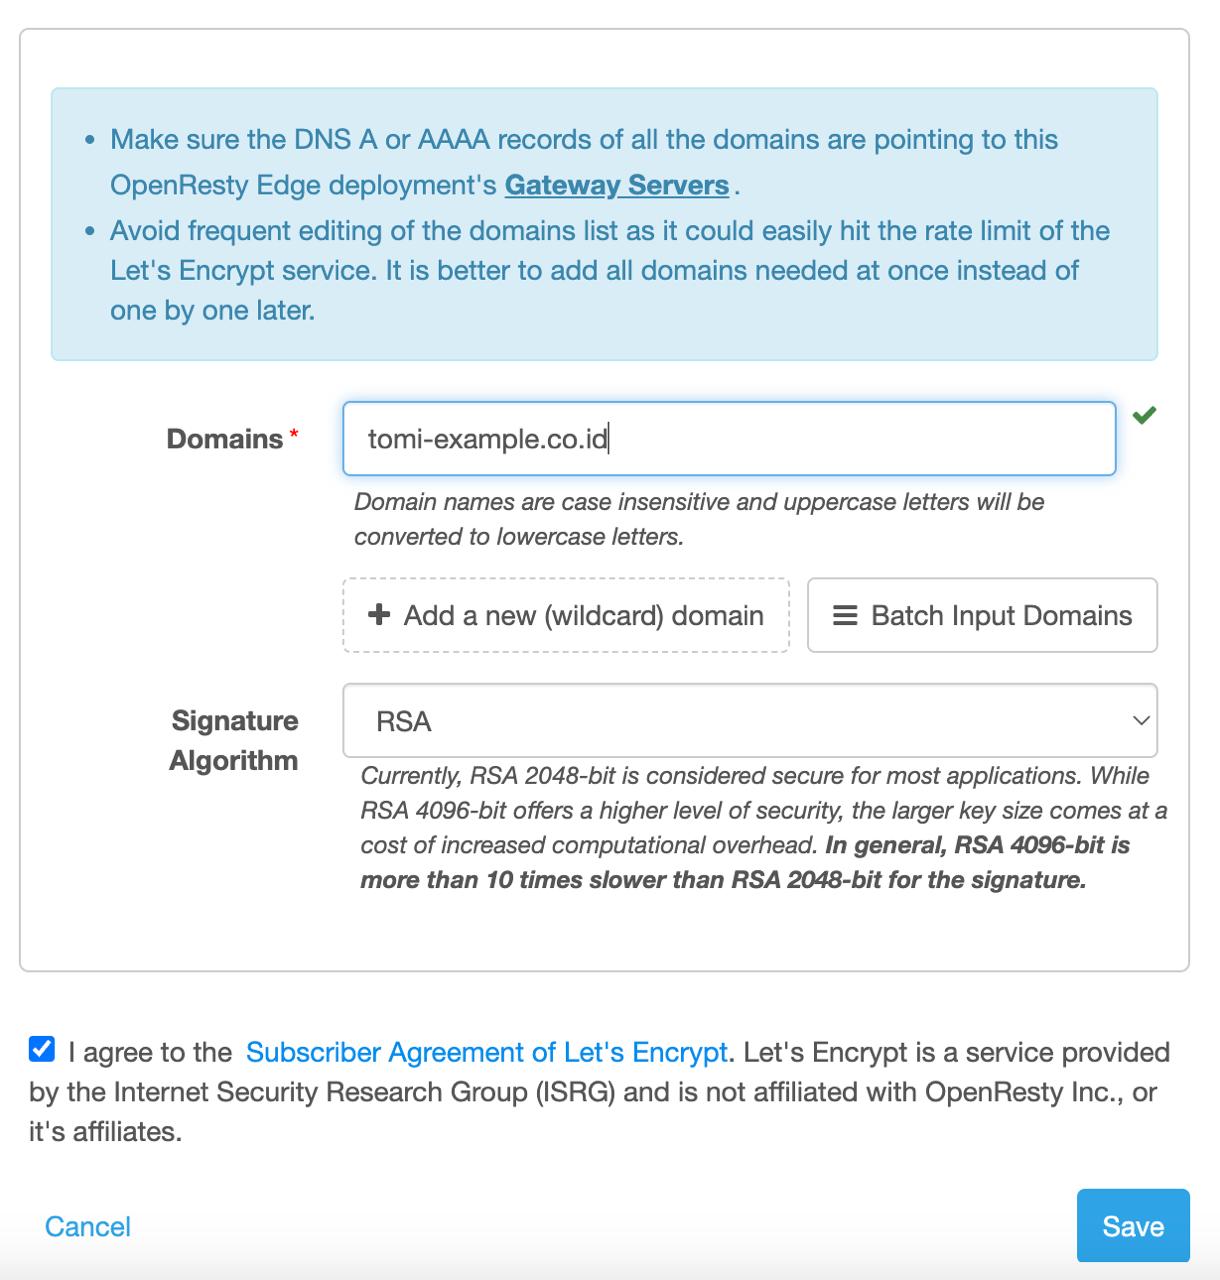
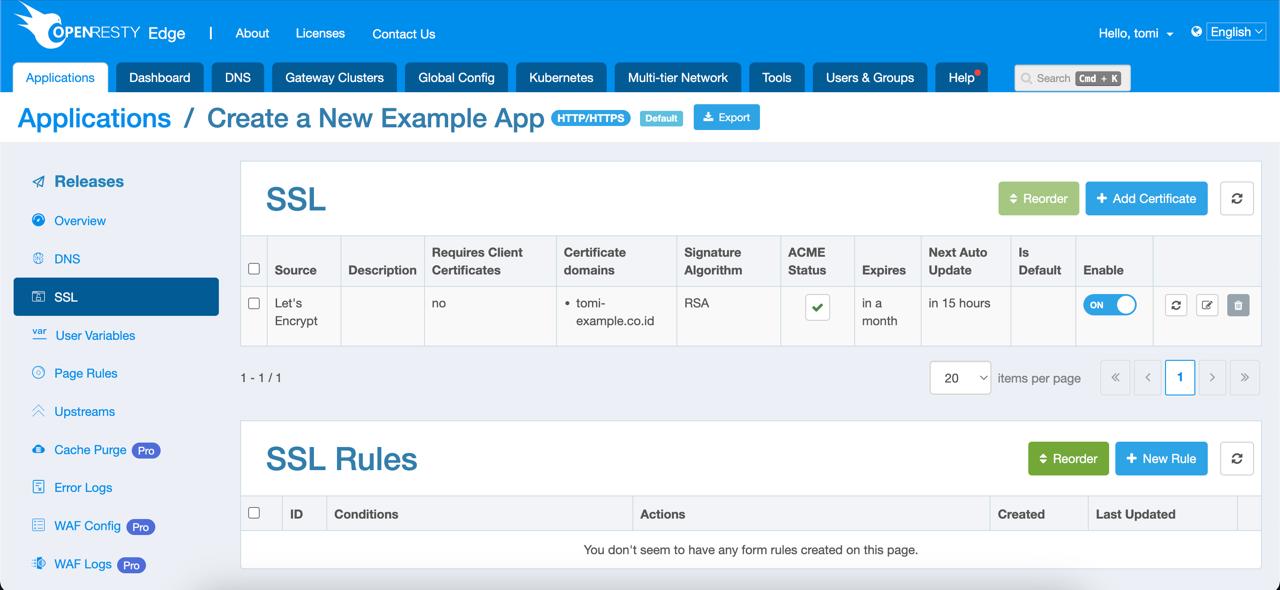
Manage SSL Certificates
In the SSL menu, you’ll see a table to manage certificates. Make sure all of these details are in order before proceeding:
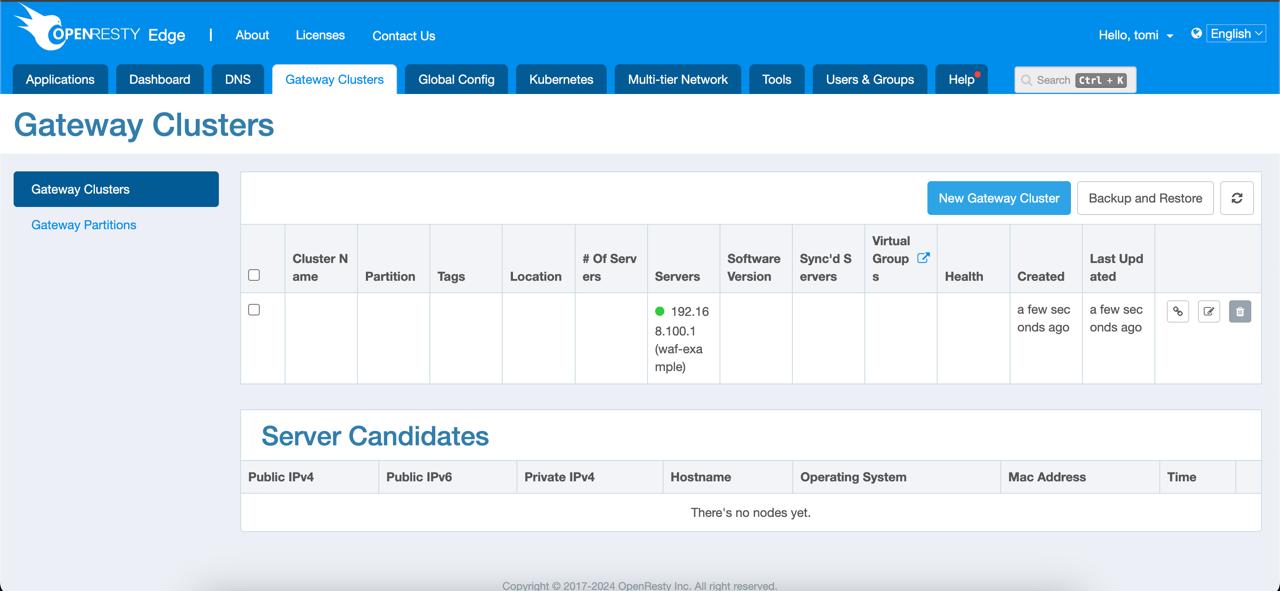
Check Gateway Clusters
Double-check that the IP addresses in the Gateway Clusters tab match your domain’s setup to avoid connection issues.
Step 5: Go Live!
Once all configurations are in place, hit the Release button to make your application live.
That’s it! Your app is now fully configured and live on OpenResty Edge. If you need help or have questions, feel free to reach out. Enjoy your new app setup!
Conclusion
And that’s a wrap! You’ve successfully created your application, set up page rules, caching, and all the necessary configurations to get your app up and running on OpenResty Edge. With these steps in place, your app will be secure, fast, and ready for the world to see.
If you ever need to tweak or update things, just refer back to this guide. Happy deploying, and enjoy your smooth sailing with OpenResty Edge!